Java Microservice on Google Kubernetes Engine (GKE) Cluster

Introduction
Java microservices remain as hot topic in 2022.
In this article, I would like to show you the steps to create a Java Microservice, and deploy it to Google Kubernetes Engine (GKE).
Prerequisites
Install Google Cloud SDK
Follow the instructions in Install Cloud SDK.
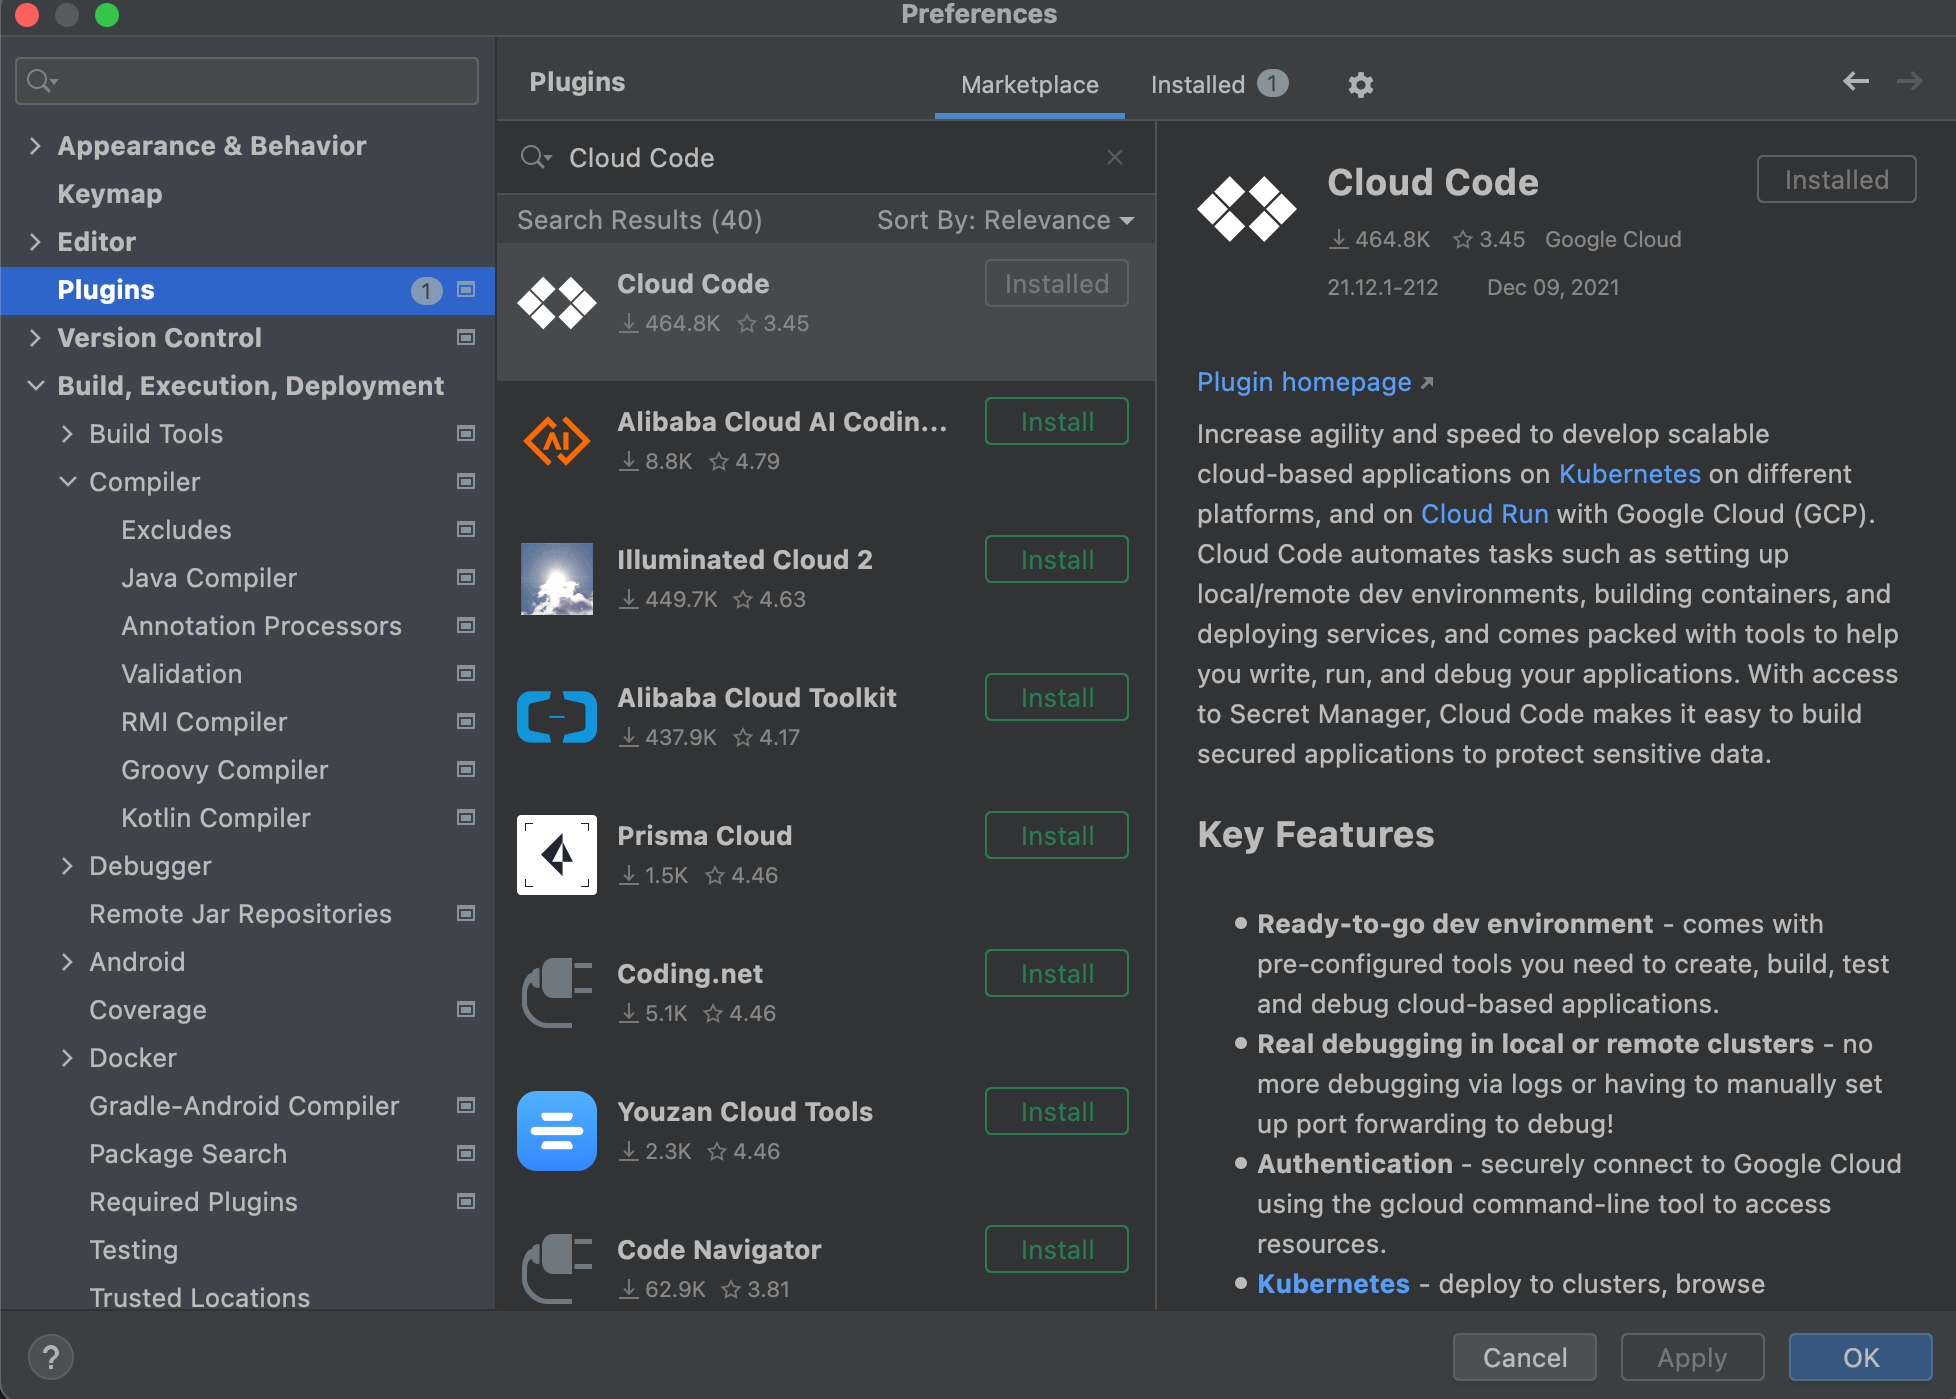
Install Cloud Code Plugin for IntelliJ
Install Cloud Code Plugin for IntelliJ from Preference -> Plugins. Search by "Cloud Code" in the "Marketplace" tab.
Configure Google Cloud
Create a Google Cloud Project
In Google Cloud Shell, perform the following steps:
i. Lists credentialed accounts and make sure the desired account is set active.
gcloud auth listii. Create a project.
gcloud projects create PROJECT_ID- Replace PROJECT_ID with your desired project ID.
iii. Set the default project.
gcloud config set project PROJECT_ID
- Replace PROJECT_ID with your project ID.
iv. Print the project ID.
echo $GOOGLE_CLOUD_PROJECT
v. Set the default zone:
gcloud config set compute/zone COMPUTE_ZONE
- Replace COMPUTE_ZONE with your compute zone, such as europe-west2-c.
vi. Set the default region:
gcloud config set compute/region COMPUTE_REGION
- Replace COMPUTE_REGION with your compute region, such as europe-west2.
vii. Show the configuration.
gcloud config list
Enable Billing in Google Cloud Console.
Enable APIs in Google Cloud Shell.
i. Enable Artifact Registry API.
gcloud services enable artifactregistry.googleapis.comii. Enable Kubernetes Engine API.
gcloud services enable container.googleapis.comiii. Enable Firestore.
gcloud services enable firestore.googleapis.com
Create an Artifact Registry
Google Cloud Artifact Registry is a successor of Container Registry, in where container images and language packages can be placed.
We will use Artifact Registry to store our container images.
Enable Artifact Registry, if it is not yet enabled.
gcloud services enable artifactregistry.googleapis.comView a list of supported locations.
gcloud artifacts locations listCreate an artifact repository.
 gcloud artifacts repositories create REPO_NAME \
 --repository-format=docker \
 --location=REPO_REGION \
 --description=REPO_DESC \
 --version-policy=REPO_POLICY
Replace REPO_NAME with the desired name for your artifact repository.
Replace REPO_REGION with your region, such as europe-west2.
Replace REPO_DESC with the description of your artifact repository.
Replace REPO_POLICY with keyword snapshot or release*.*
Here below is a working example:
    gcloud artifacts repositories create ms-docker-image \
    --repository-format=docker \
    --location=europe-west2 \
    --description="Snapshot repository for docker images" \
    --version-policy=snapshot
The full name of the created repository will be
$(REPO_REGION)-$(REPO_FORMAT).pkg.dev/$(PROJECT_ID)/$(REPO_NAME)
List all artifact repositories created in the project.
gcloud artifacts repositories list
Create a Google Kubernetes Engine (GKE) Cluster
Enable Kubernetes Engine API, if it is not yet enabled.
gcloud services enable container.googleapis.comCreate a GKE Cluster.
gcloud container clusters create CLUSTER_NAME \ --num-nodes=1 \ --region europe-west2 \ --release-channel regular \ --scopes=datastore,storage-rw,compute-ro- Replace CLUSTER_NAME with the desired name for your GKE cluster.
It will take several minutes to create the cluster.
After the cluster is created, get authentication credentials to interact with the cluster.
gcloud container clusters get-credentials CLUSTER_NAME- Replace CLUSTER_NAME with your GKE cluster name.
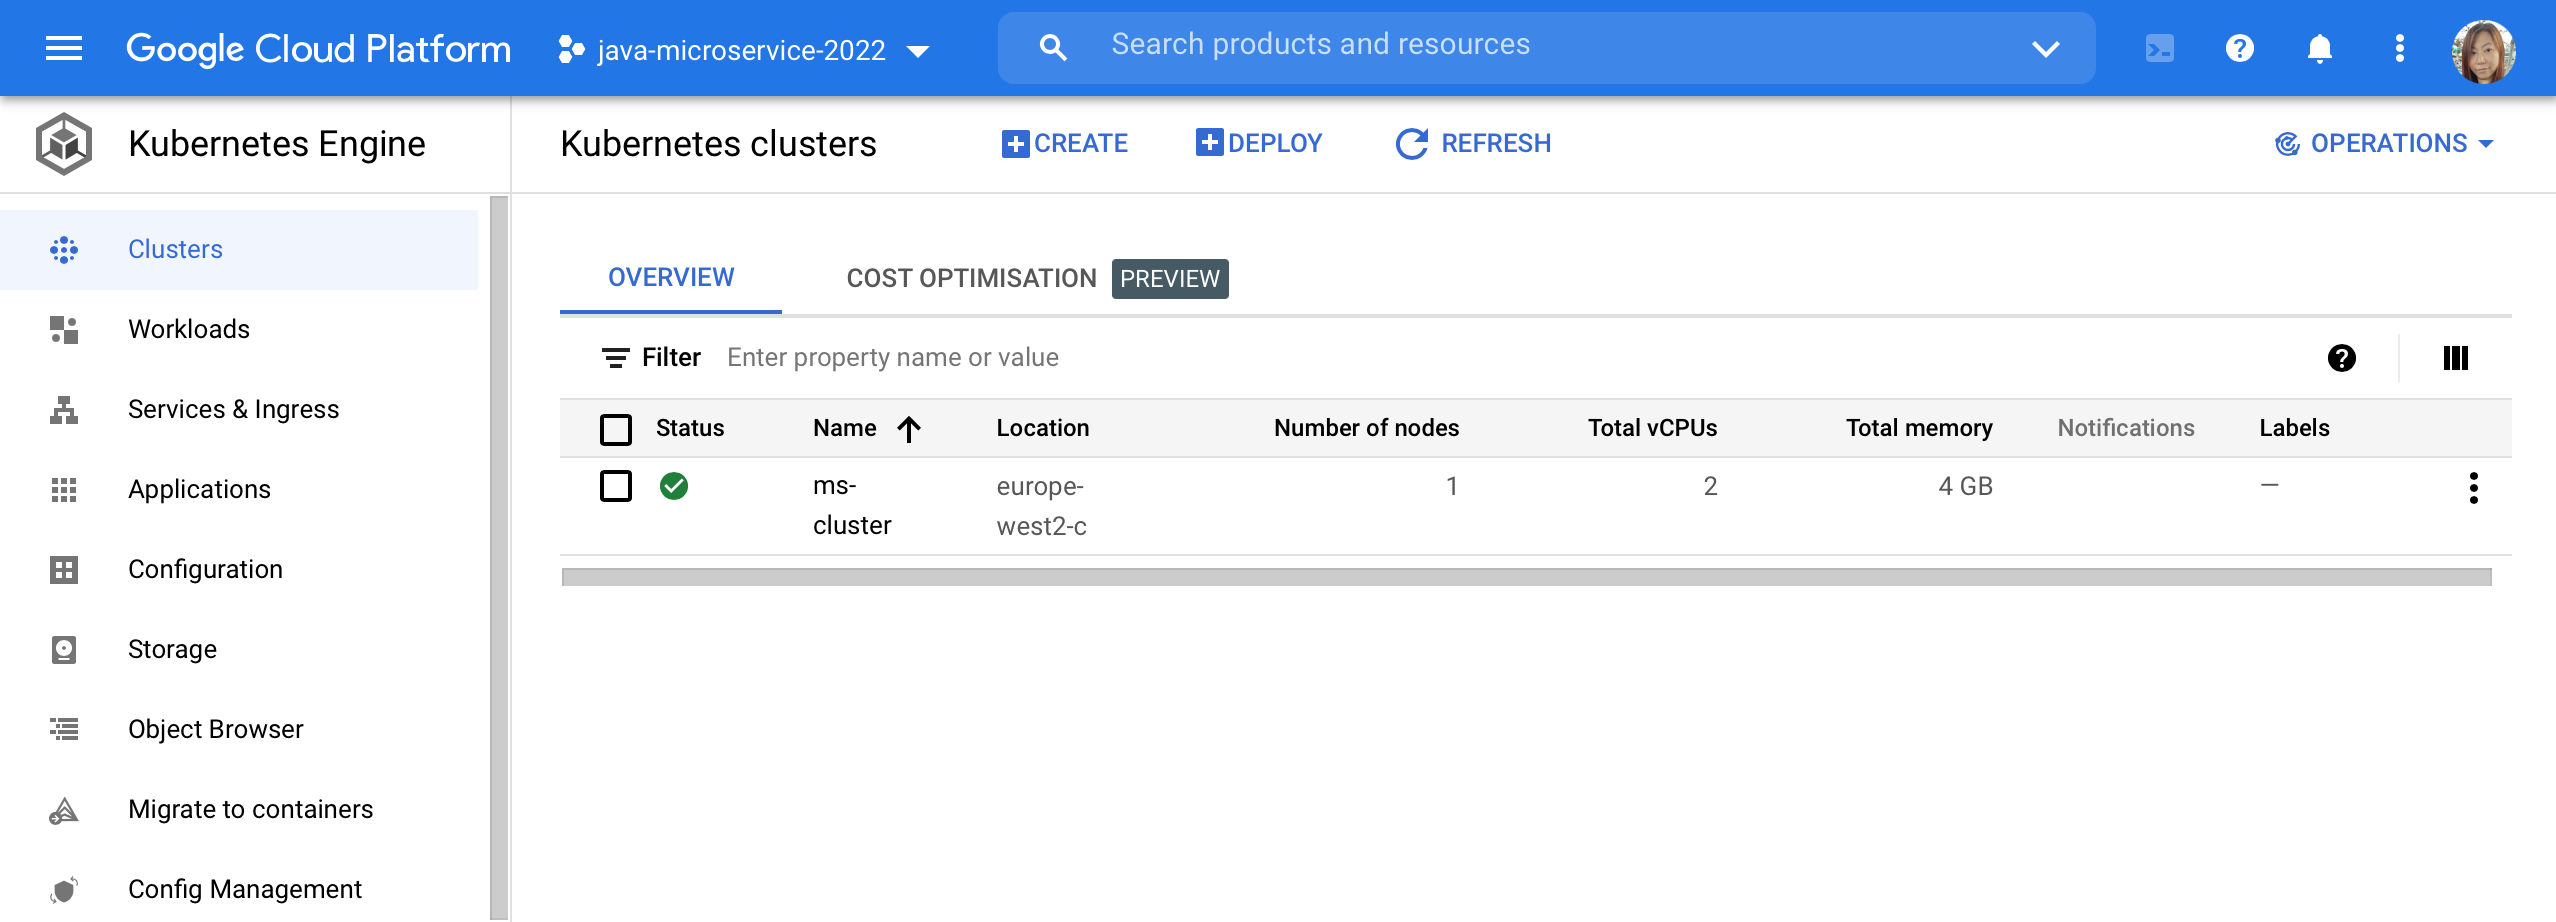
List all clusters.
gcloud container clusters listWe can also check whether the cluster is created or not in Google Cloud Console -> Kubernetes Clusters.
Code the Java Microservice
Spring Boot enables quick development of Java microservices with various dependency and plugin support to Google Cloud technologies.
Complete Source Code can be found in my GitHub repositories.
Write the application codes
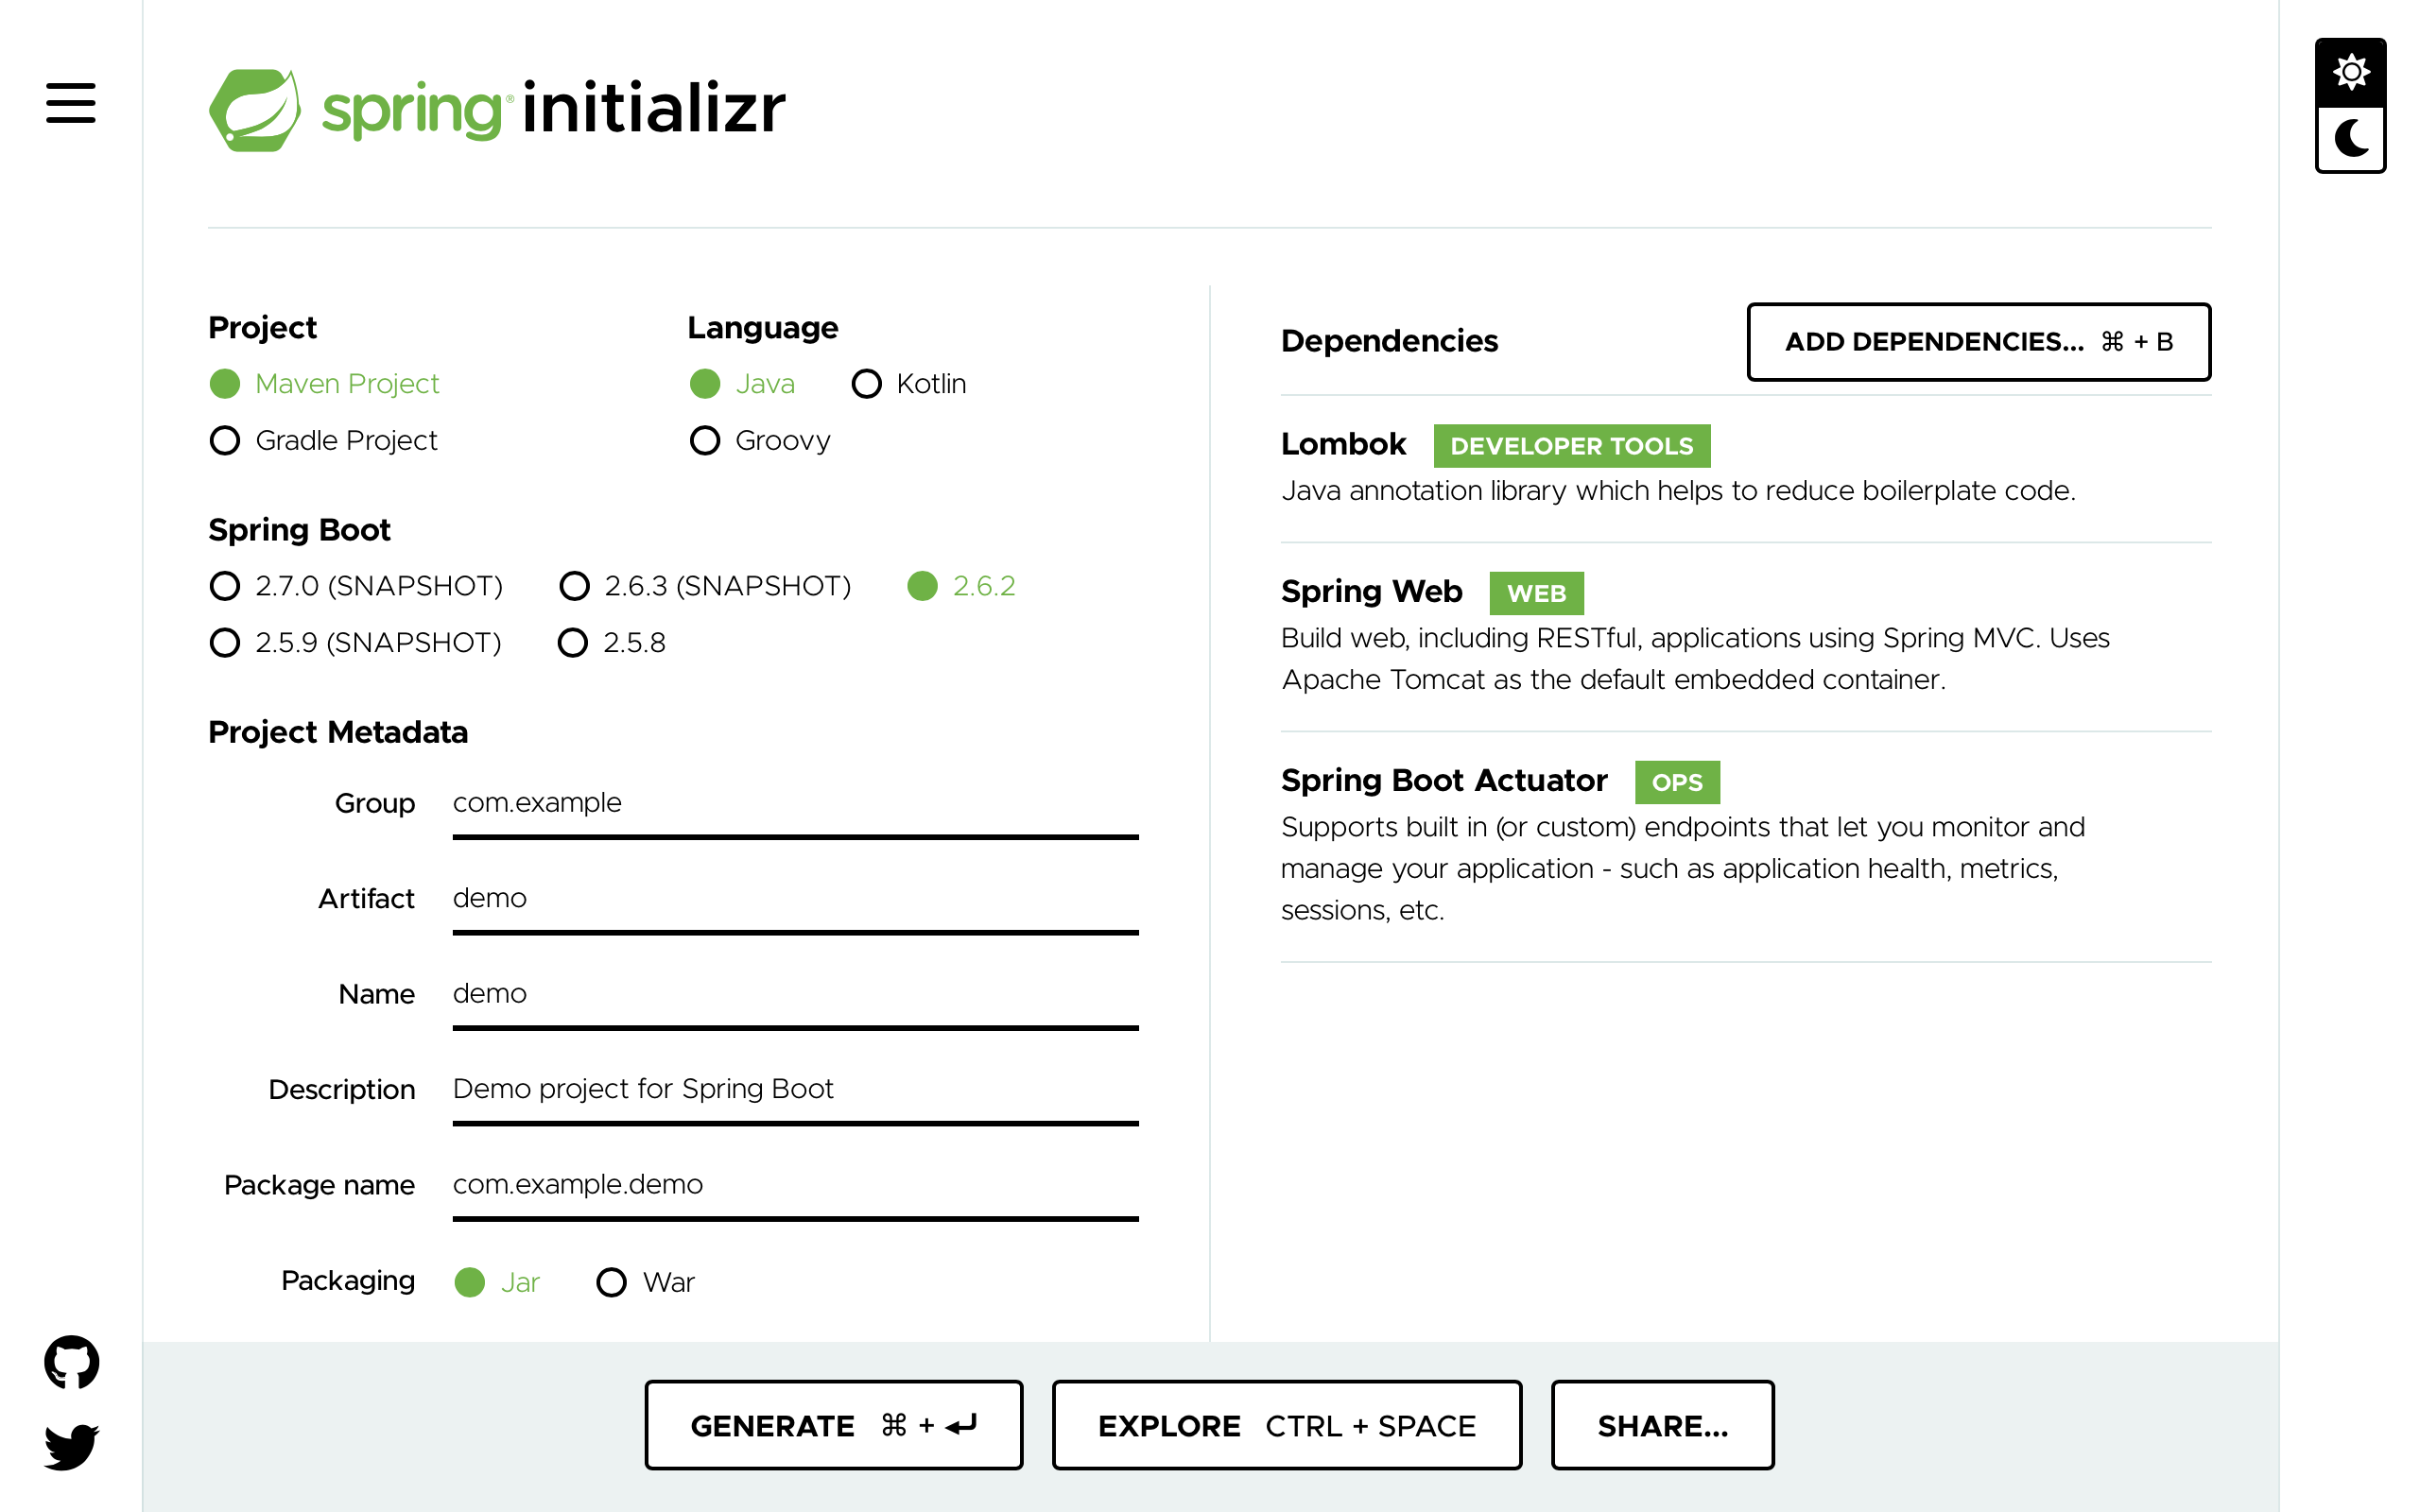
Generate a Spring Boot application.
To create a Spring Boot application, use the Spring Initializr to generate a simple Spring Boot . Add the following dependencies:
Spring Web
Spring Boot Actuator
Lombok
Spring Boot Actuator provides end points for health check of the application.
Lombok is a Java annotation library that reduces boilerplate code by using annotations.
Click the "Generate" button to download the ZIP file.
Unzip the file to the project root directory.
Modify pom.xml to add dependencies for GCP.
- Versions
    <properties>
        <spring-cloud-gcp.version>1.2.8.RELEASE</spring-cloud-gcp.version>
        <spring-cloud.version>2021.0.0</spring-cloud.version>
    </properties>
- Dependencies
    <dependencies>
        <dependency>
            <groupId>org.springframework.cloud</groupId>
            <artifactId>spring-cloud-gcp-data-datastore</artifactId>
        </dependency>

        <dependency>
            <groupId>org.springframework.cloud</groupId>
            <artifactId>spring-cloud-gcp-starter-data-datastore</artifactId>
        </dependency>
    </dependencies>
- Dependency Management
    <dependencyManagement>
        <dependencies>
            <dependency>
                <groupId>org.springframework.cloud</groupId>
                <artifactId>spring-cloud-dependencies</artifactId>
                <version>${spring-cloud.version}</version>
                <type>pom</type>
                <scope>import</scope>
            </dependency>
            <dependency>
                <groupId>org.springframework.cloud</groupId>
                <artifactId>spring-cloud-gcp-dependencies</artifactId>
                <version>${spring-cloud-gcp.version}</version>
                <type>pom</type>
                <scope>import</scope>
            </dependency>
        </dependencies>
    </dependencyManagement>
Create a Java model class.
The Lombok @Data annotation saves the time of writing the getter and setter functions.
The Lombok @AllArgsConstructor annotation saves the time of writing the constructor.
The @Entity annotation specifies that it is a Firestore entity in datastore mode.
    import org.springframework.cloud.gcp.data.datastore.core.mapping.Entity;
    import org.springframework.data.annotation.Id;

    import lombok.AllArgsConstructor;
    import lombok.Data;

    @Entity
    @Data
    @AllArgsConstructor
    public class CustomerAccount {

        @Id
        private Long accountId;

        private String lastName;

        private String firstName;

    }
Create a Spring Repository interface for Google Datastore.
 import org.springframework.cloud.gcp.data.datastore.repository.DatastoreRepository;
 import org.springframework.stereotype.Repository;

 @Repository
 public interface CustomerAccountRepository extends DatastoreRepository<CustomerAccount, Long> {

     List<CustomerAccount> findByLastName(String name);

 }
Create a Java Controller class for REST endpoints.
The Lombok @RequiredArgsConstructor annotation saves the time of writing the constructor.
The Lombok @Slf4j annotation facilitates SLF4J for logging with the least configurations.
  import lombok.RequiredArgsConstructor;
  import lombok.extern.slf4j.Slf4j;

  @RestController
  @Slf4j
  @RequiredArgsConstructor
  public class CustomerAccountController {

      private final CustomerAccountRepository customerAccountRepository;

      @GetMapping("/api/customerAccounts")
      public Iterable<CustomerAccount> getAllCustomerAccounts() {
          log.debug("->getAllCustomerAccounts");
          return customerAccountRepository.findAll();
      }

      @GetMapping("/api/customerAccount/{lastName}")
      public List<CustomerAccount> findByLastName(@PathVariable("lastName") String name) {
          log.debug("->findByLastName");
          return customerAccountRepository.findByLastName(name);
      }

      @PostMapping("/api/customerAccounts")
      public CustomerAccount saveCustomerAccount(@RequestBody CustomerAccount customerAccount) {
          log.debug("->saveCustomerAccount {}", customerAccount);
          return customerAccountRepository.save(customerAccount);
      }
  }
Enable Spring Boot Actuator in application.properties.
management.endpoint.health.enabled=true
Test the application functions Locally
In IntelliJ Terminal,
Lists credentialed accounts and make sure the desired account is set active.
gcloud auth listSet the default project.
gcloud config set project PROJECT_ID- Replace PROJECT_ID with your project ID.
Show the configuration.
gcloud config listStart the Spring Boot application.
./mvnw spring-boot:run
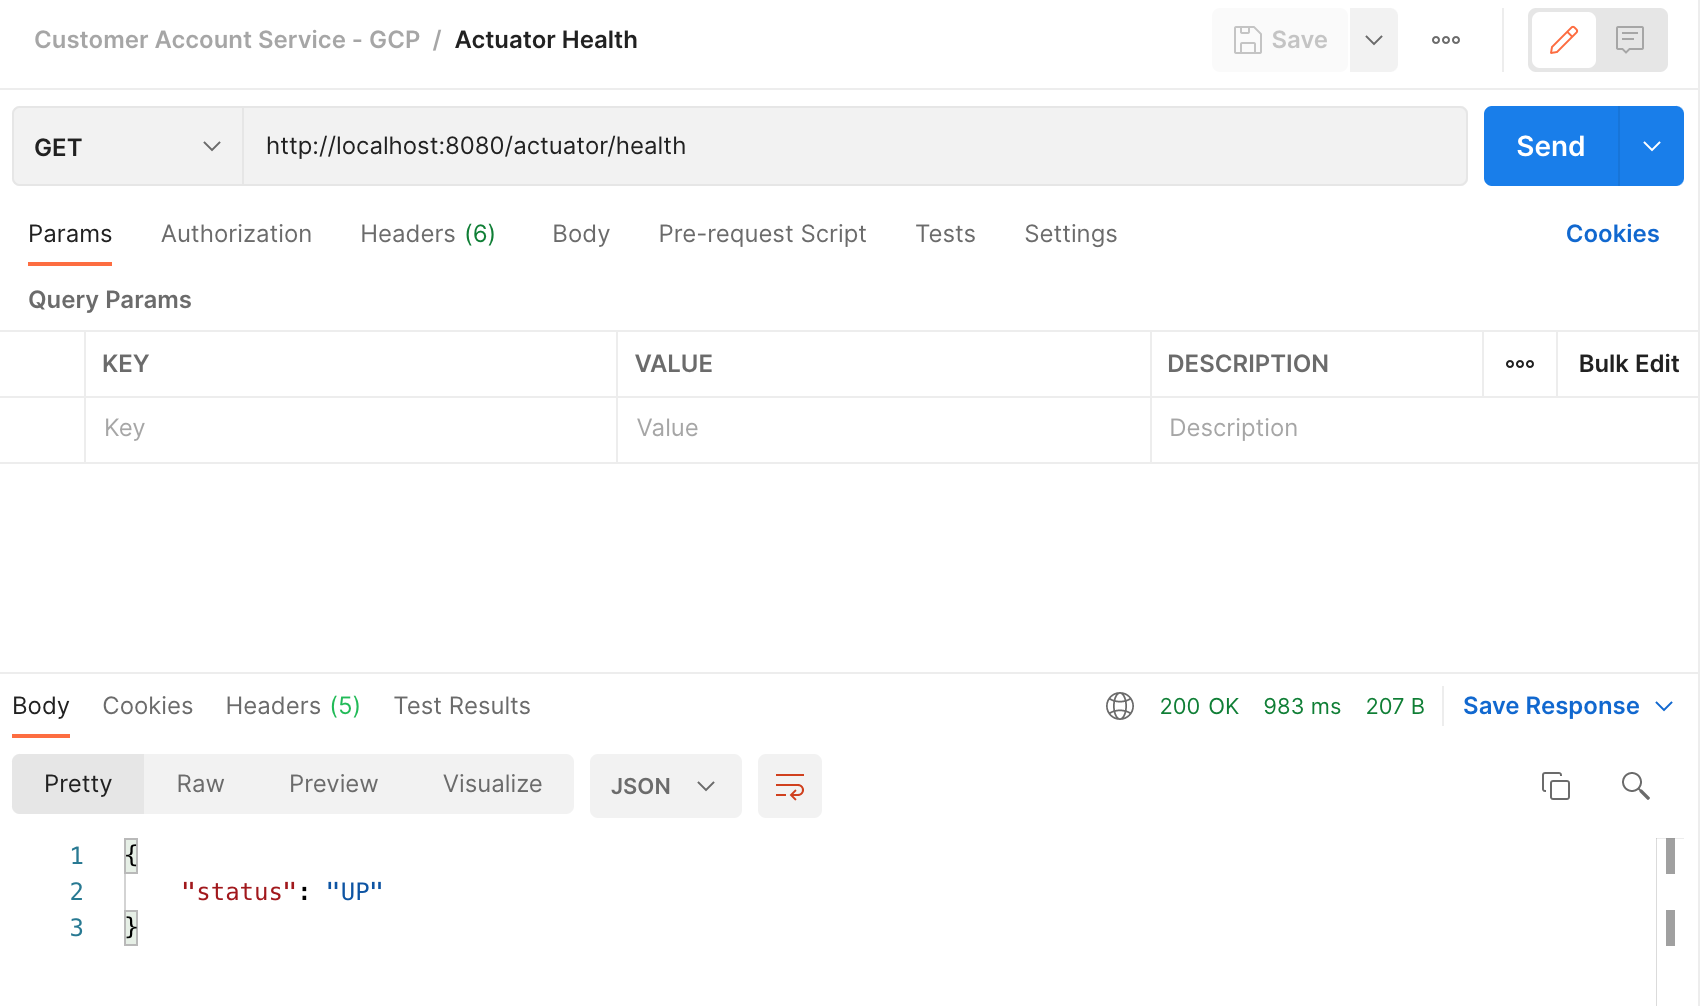
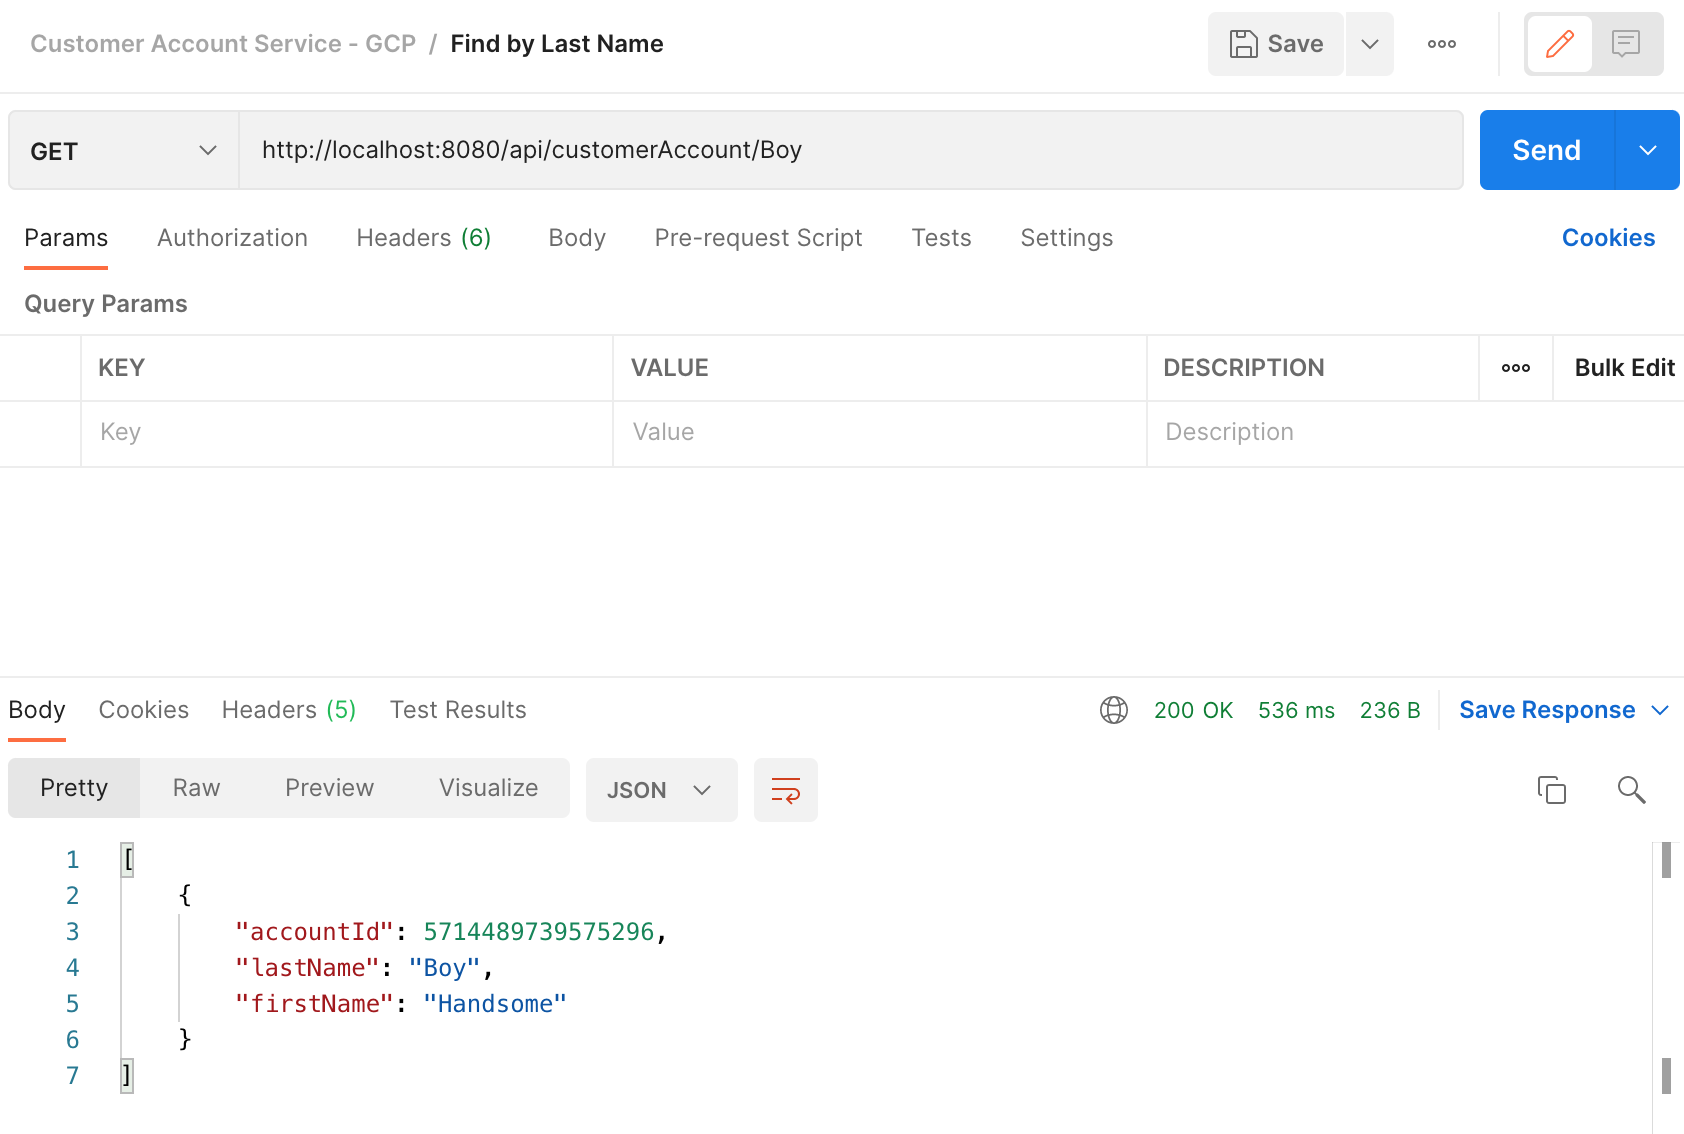
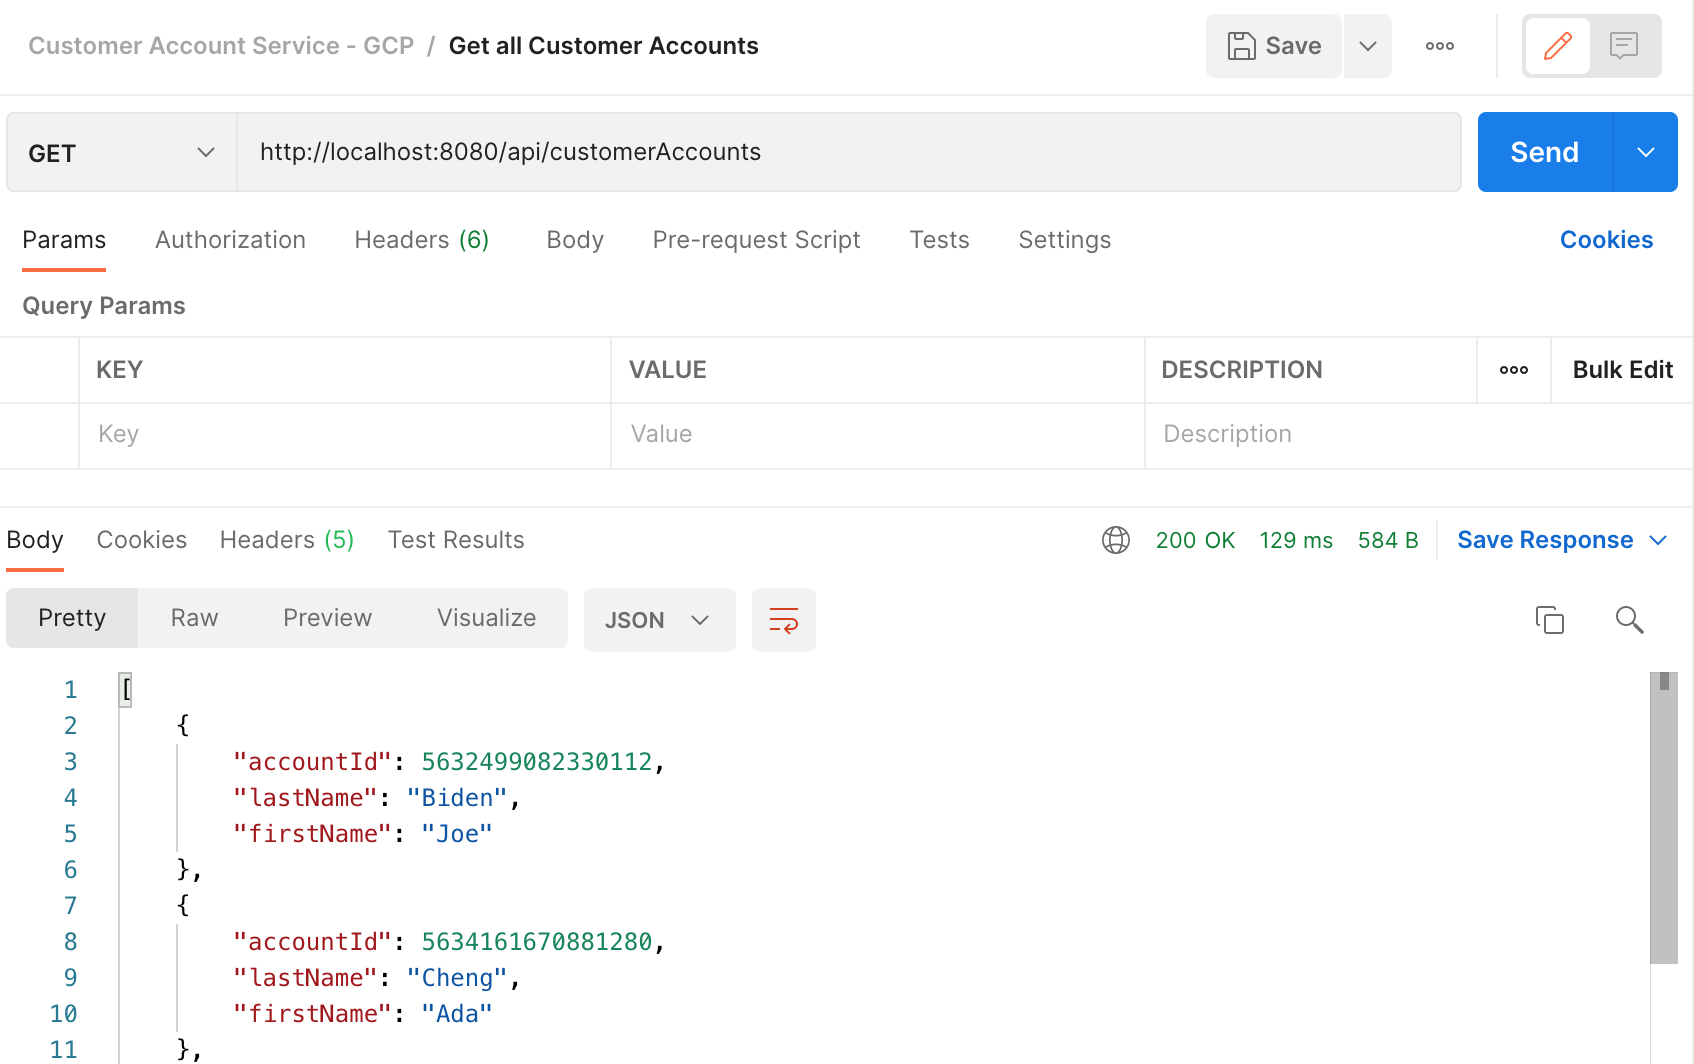
Use a REST client, like Postman, to perform following tests:
Perform health check.
Test application function: Create new Customer Account.

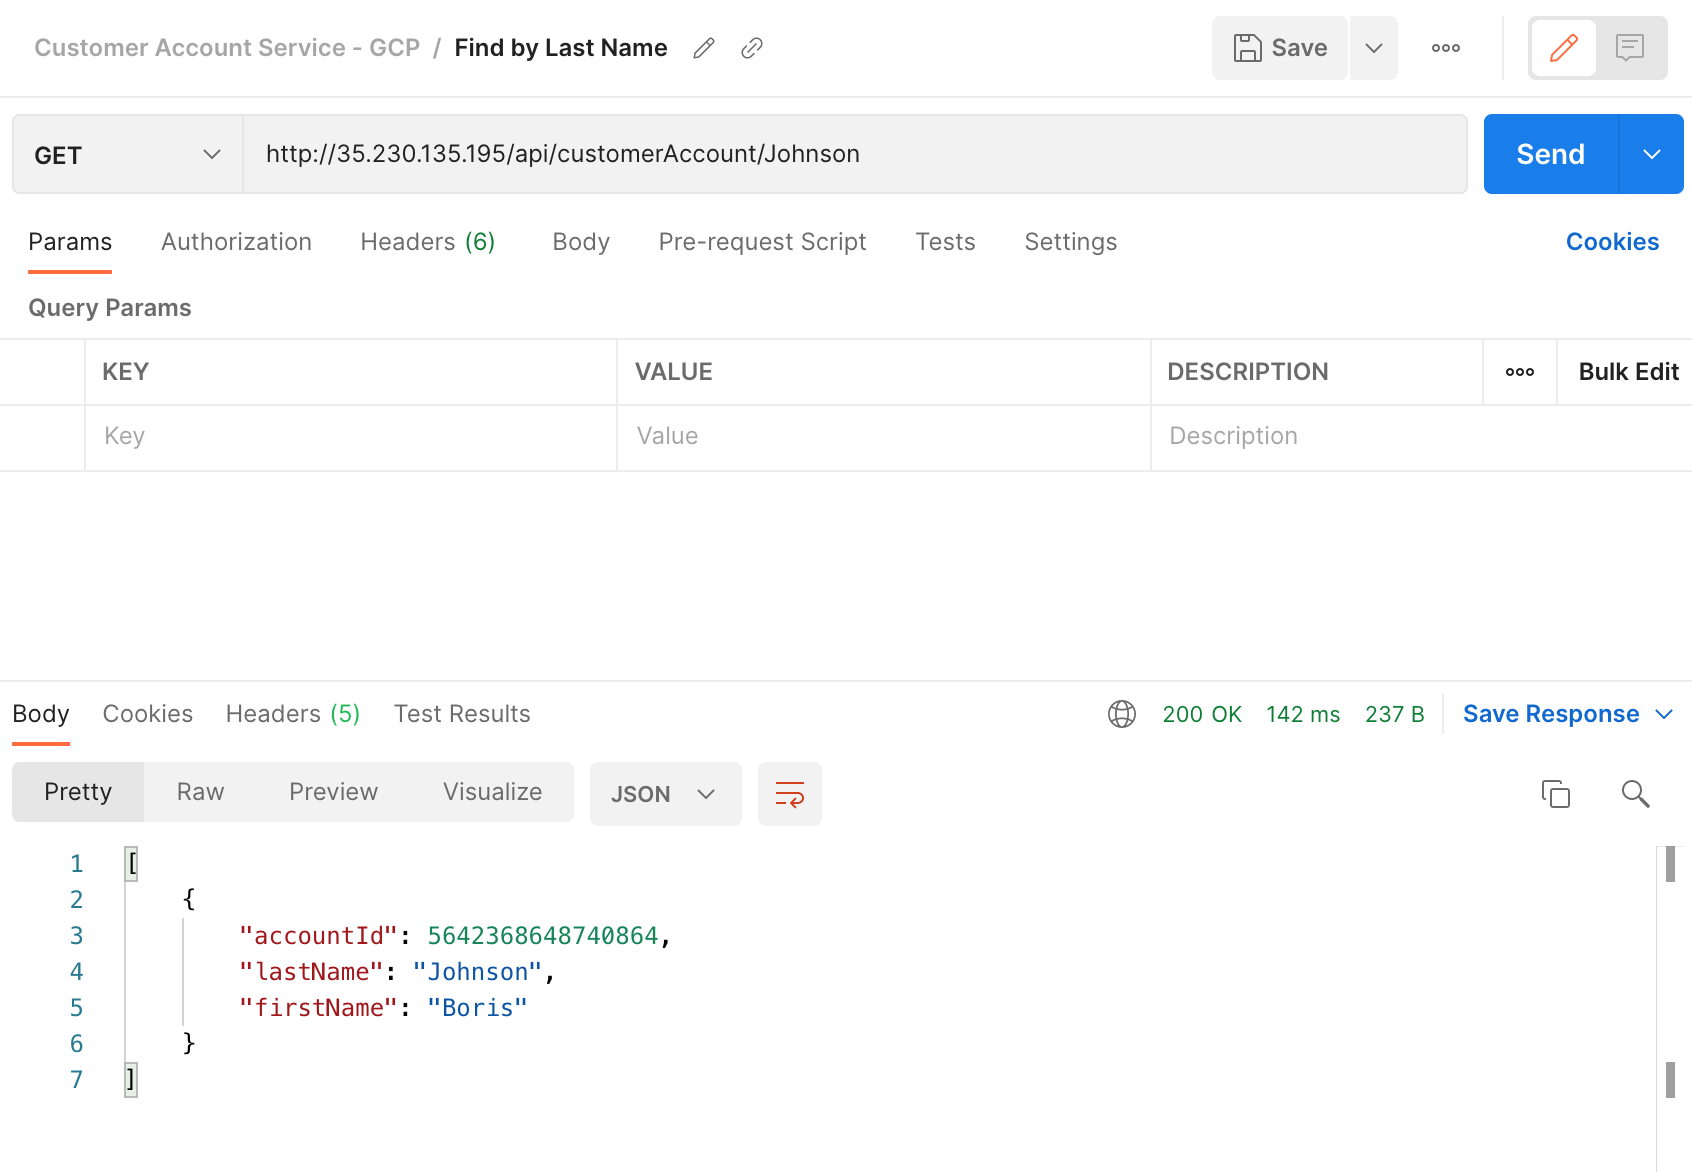
Test application function: Find by Last Name.
Test application function: List all Customer Accounts.
Containerize the Microservice
In general, we need to write a Dockerfile to dockerize the microservice.
However, in this exercise, we will use Google Cloud's Jib Maven Plugin to build the container images without writing a Dockerfile.
Add Jib Maven plugin in pom.xml.
<plugin> <groupId>com.google.cloud.tools</groupId> <artifactId>jib-maven-plugin</artifactId> <version>3.1.4</version> <configuration> <to> <image>europe-west2-docker.pkg.dev/java-microservice-2022/ms-containers/${project.artifactId}</image> </to> </configuration> </plugin>- Replace with your Full Container Name inside the <image> tag.
At the project root, execute the following command:
./mvnw install jib:buildThis will build the docker image and publish it to the Artifact Registry.
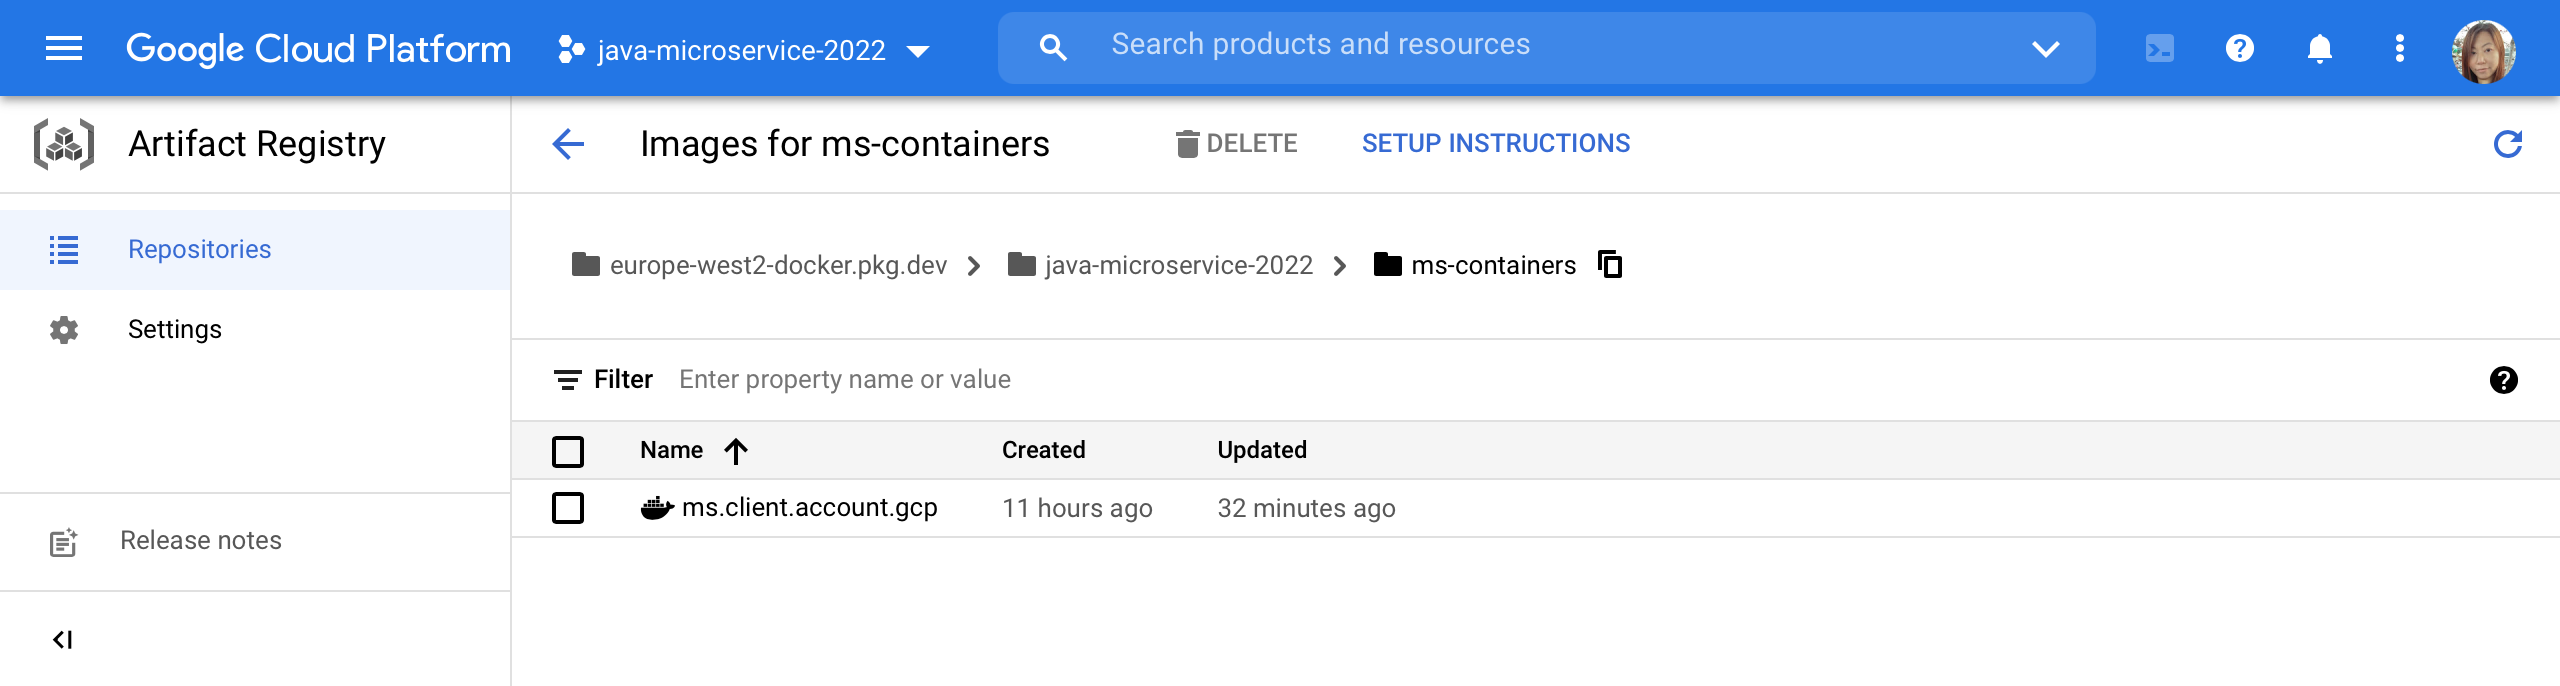
Use the following command to list docker images in the Artifact Registry.
gcloud artifacts docker images list FULL_CONTAINER_NAME- Replace FULL_CONTAINER_NAME with your Full Container Name.
Or you can check the image in Google Cloud Console.
Deploy the Microservice to GKE
Configure a Run/Debug Configuration for Cloud Code: Kubernetes
In this process, we need to write manifest files in YAML format. One is deployment.yaml and the other is service.yaml.
Write deployment.yaml and put it in the project root directory.
 apiVersion: apps/v1
 kind: Deployment
 metadata:
   name: account-service-deployment
 spec:
   selector:
     matchLabels:
       app: account-service-pod
   replicas: 1
   template:
     metadata:
       labels:
         app: account-service-pod
     spec:
       containers:
         - name: account-service-container
           image: europe-west2-docker.pkg.dev/java-microservice-2022/ms-containers/ms.client.account.gcp
           ports:
             - containerPort: 8080
           livenessProbe:
             initialDelaySeconds: 20
             httpGet:
               port: 8080
               path: /actuator/health
           readinessProbe:
             initialDelaySeconds: 30
             httpGet:
               port: 8080
               path: /actuator/health
Replace account-service-deployment with the name of your deployment.
Replace account-service-pod with the name of your pod.
Replace account-service-container with the name of your container.
Write server.yaml and put it in the project root directory.
 apiVersion: v1
 kind: Service
 metadata:
   name: account-service
 spec:
   type: NodePort
   selector:
     app: account-service-pod
   ports:
     - port: 8080
       targetPort: 8080
Replace account-service with the name of your service.
Replace account-service-pod with the name of your pod.
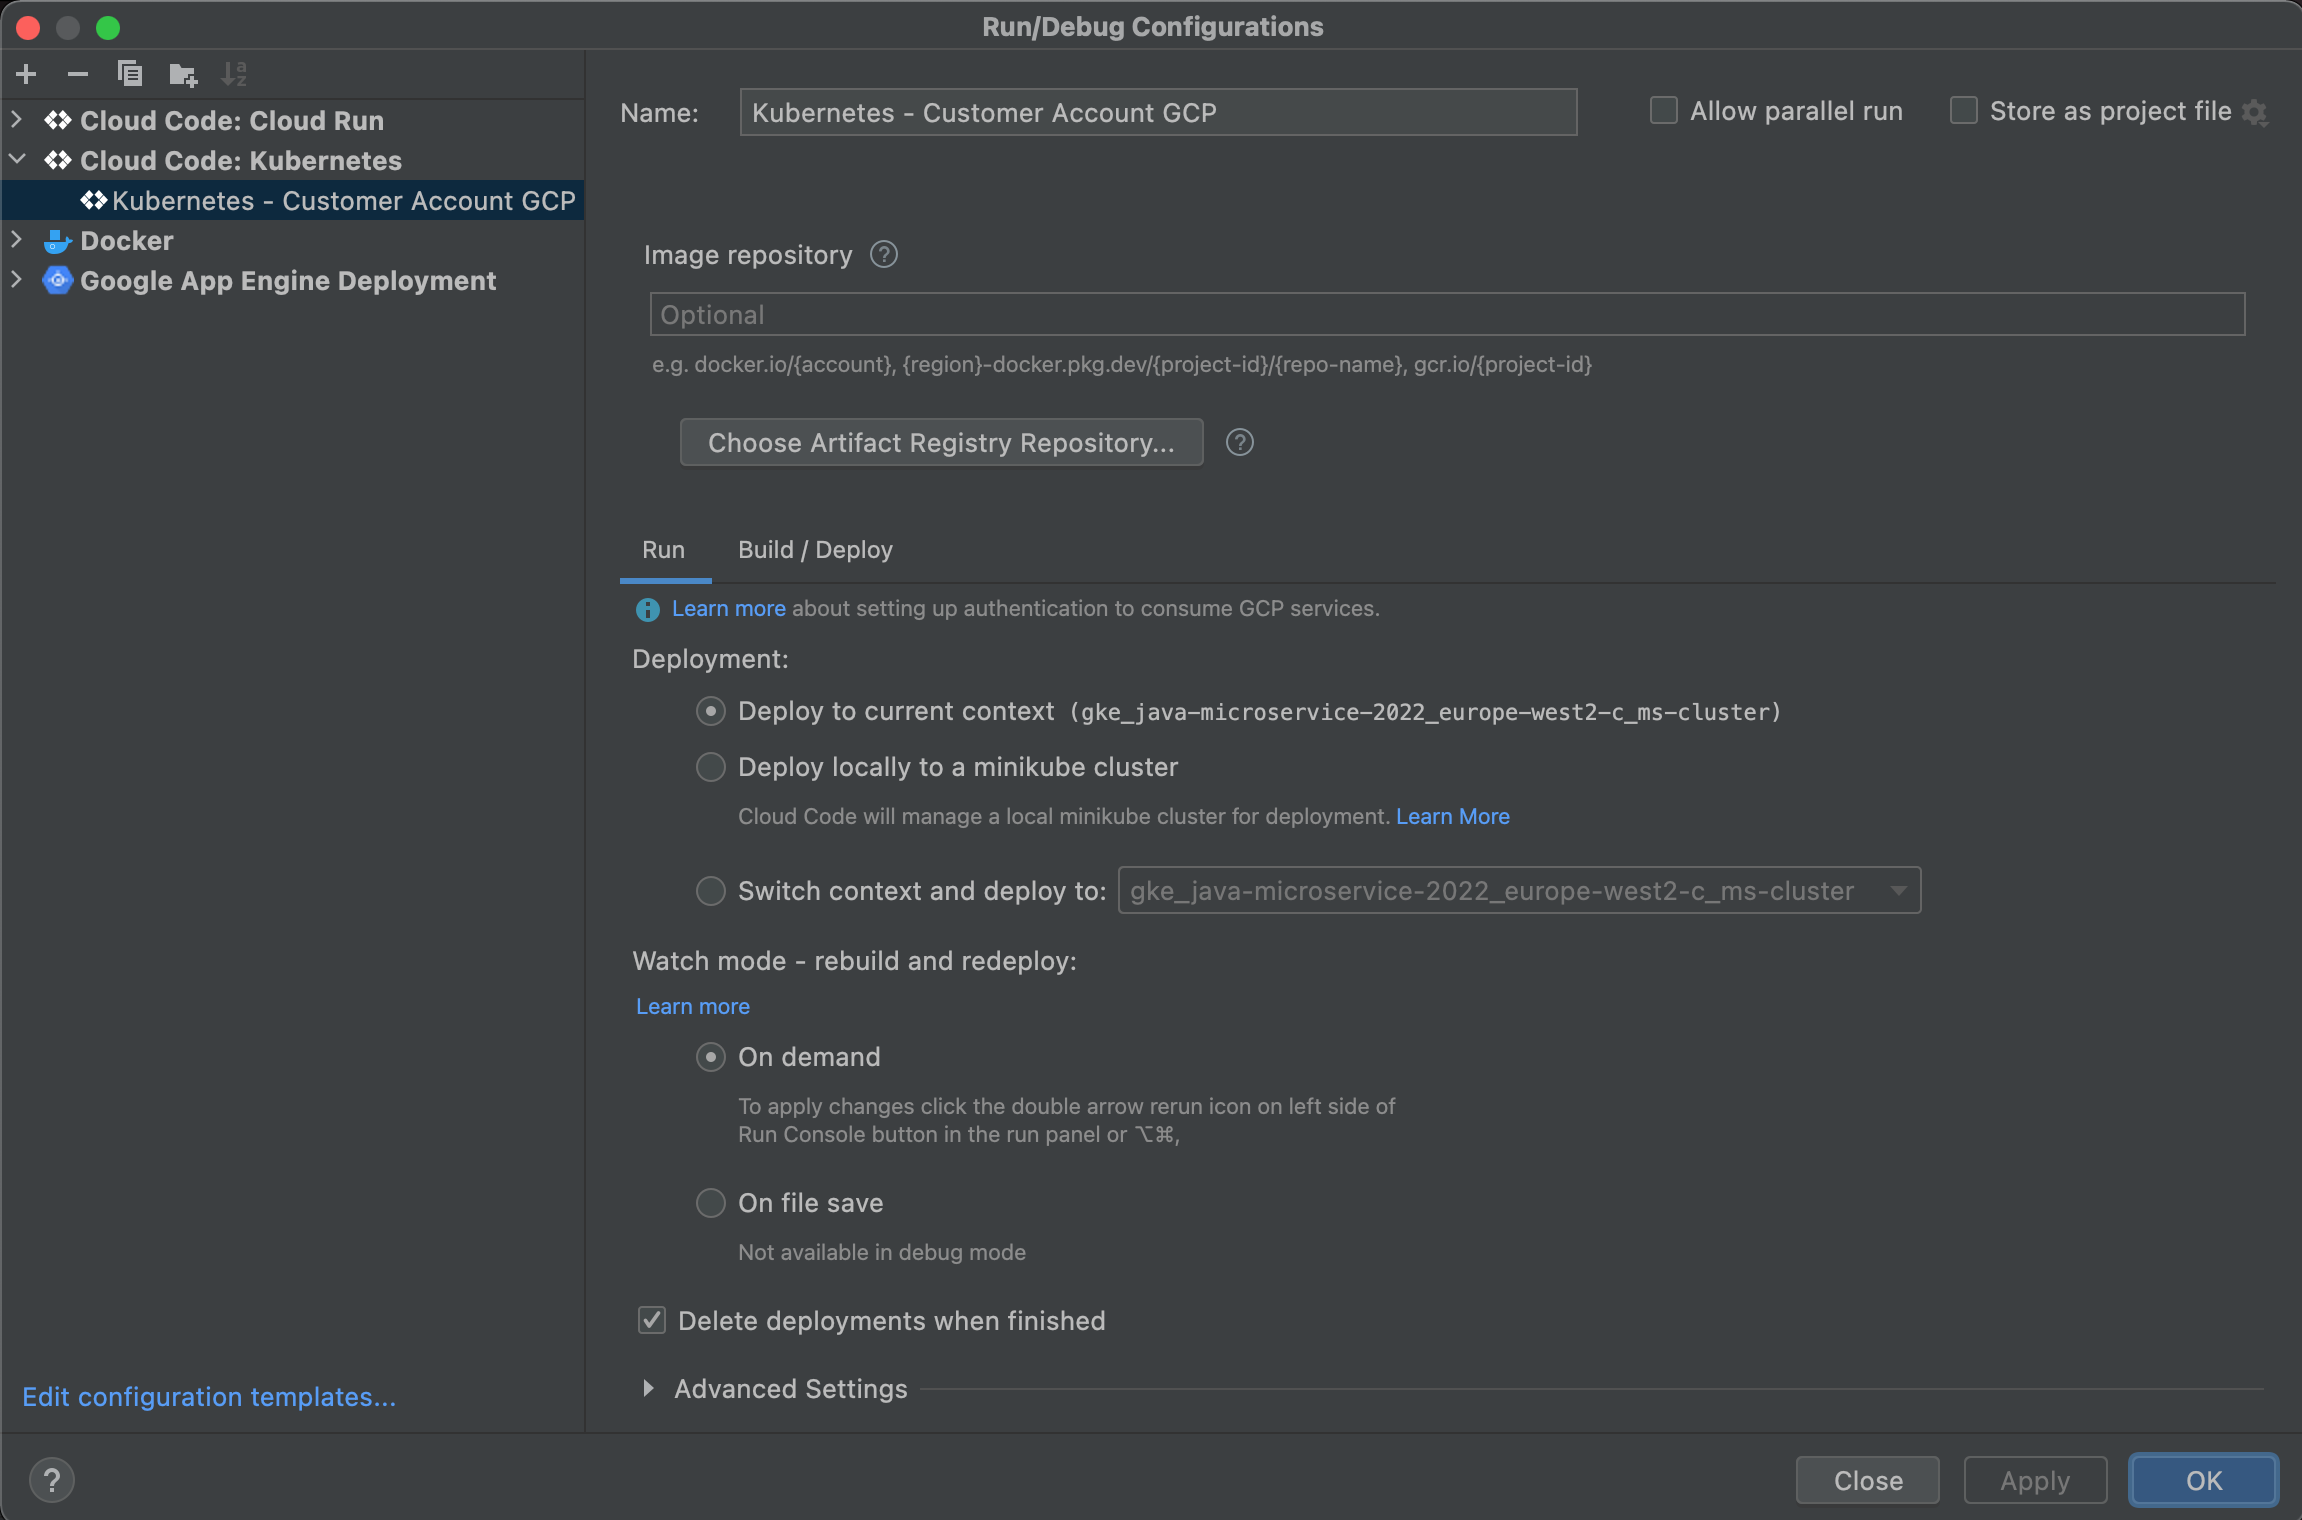
Add a new Run/Debug Configuration for Cloud Code: Kubernetes.
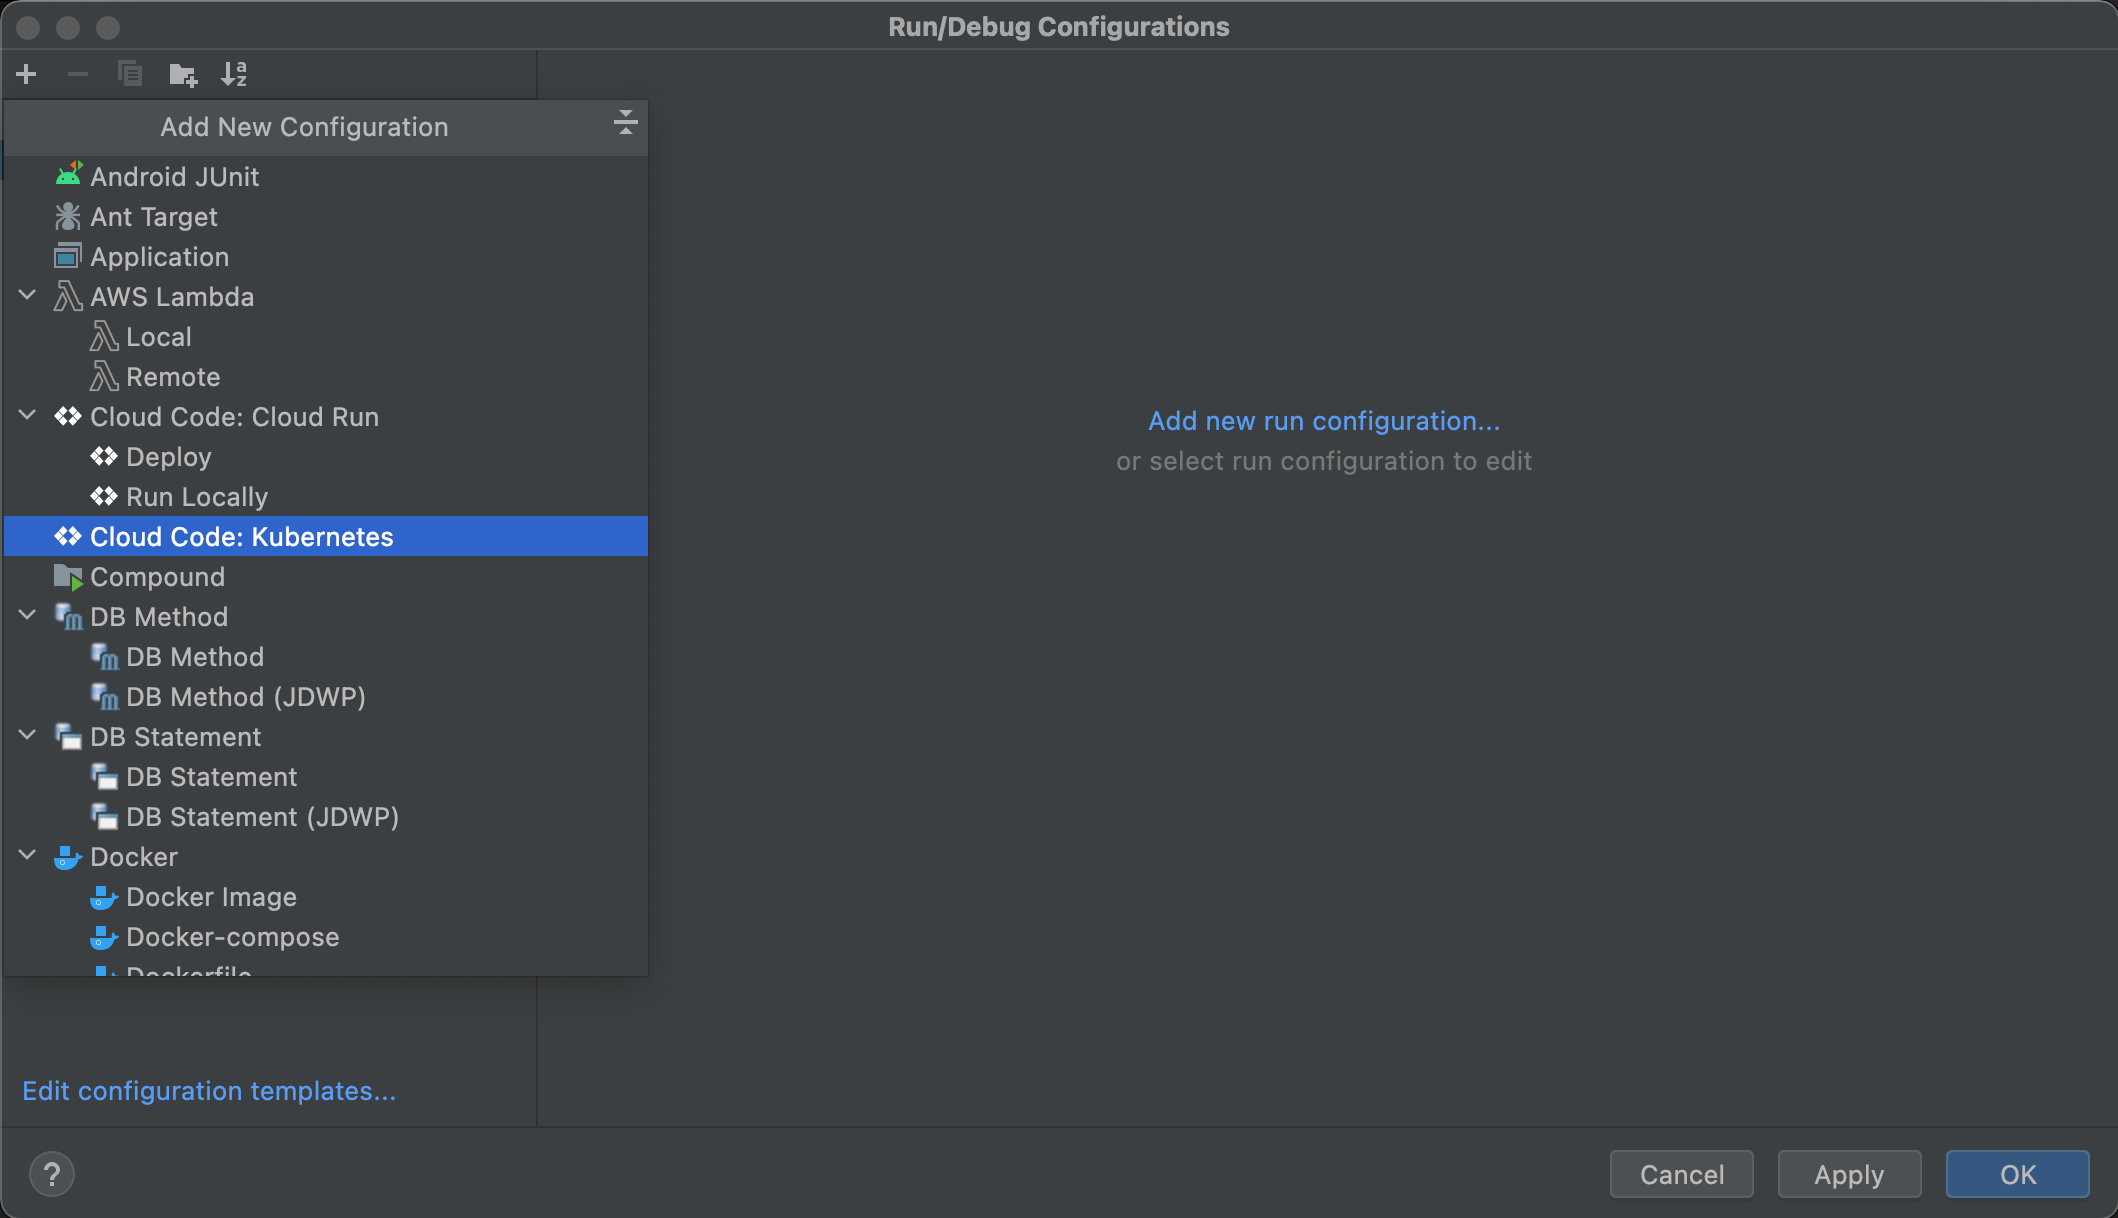
Change the name of the Configuration.
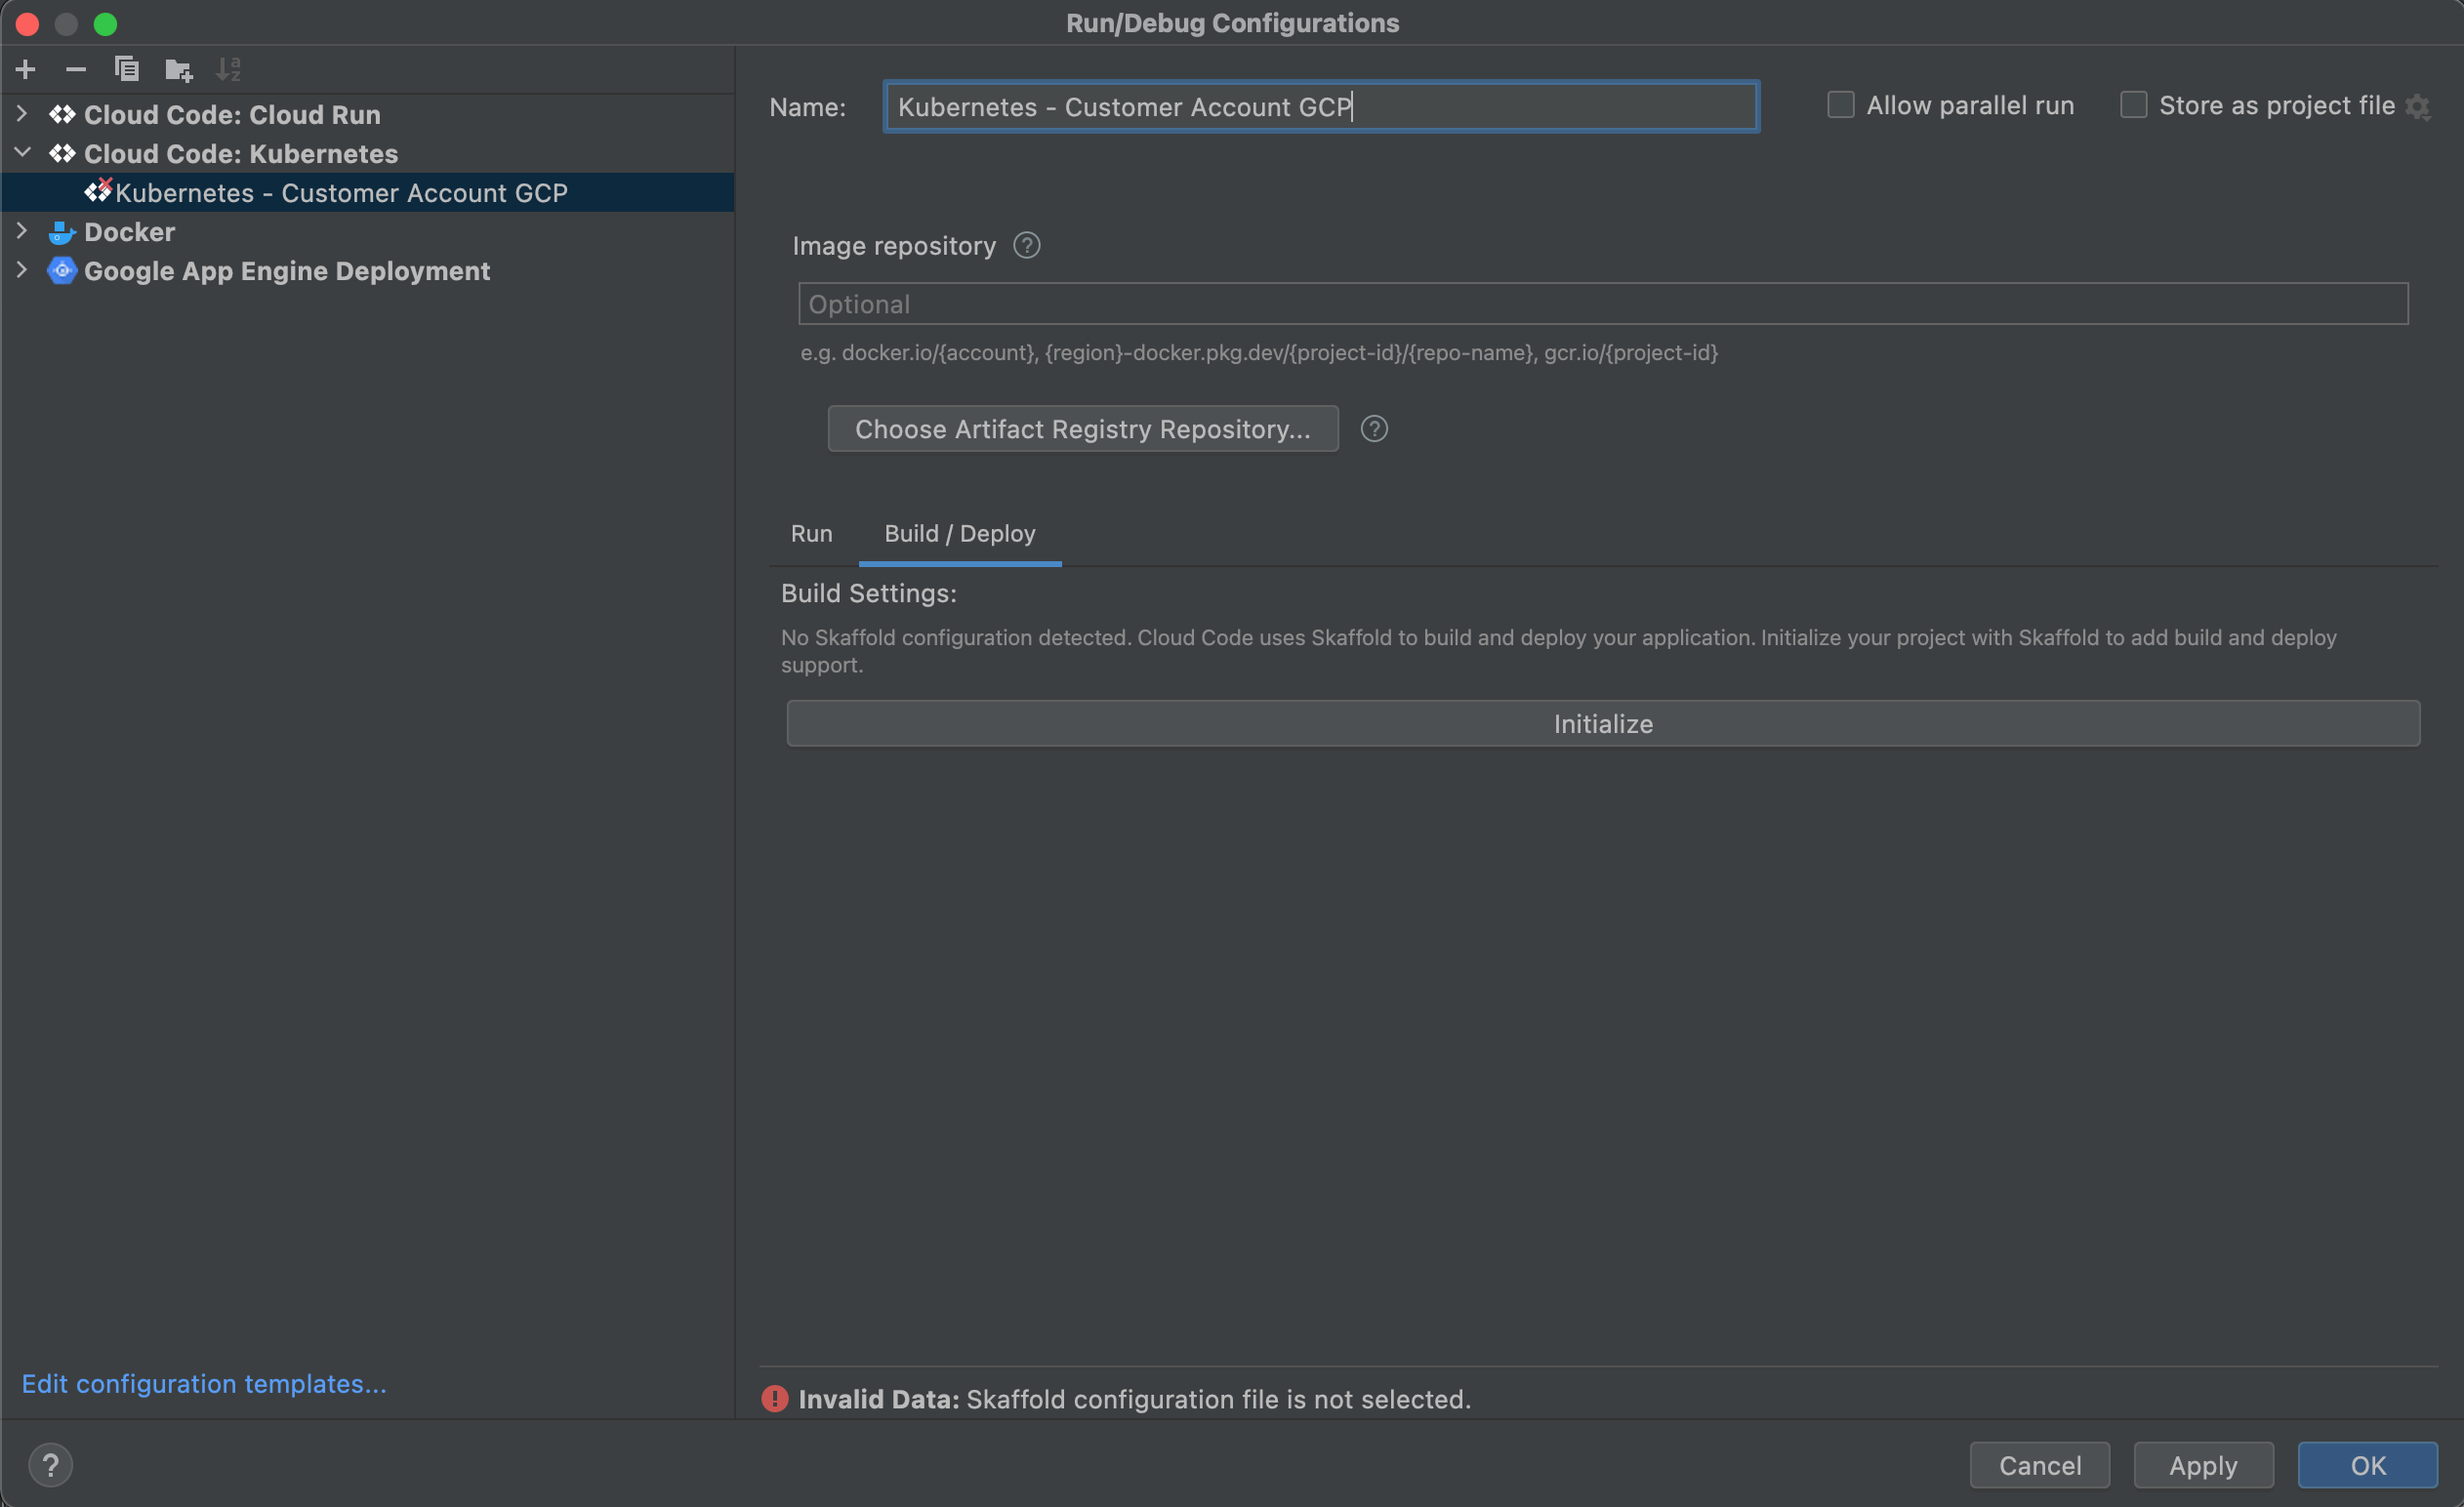
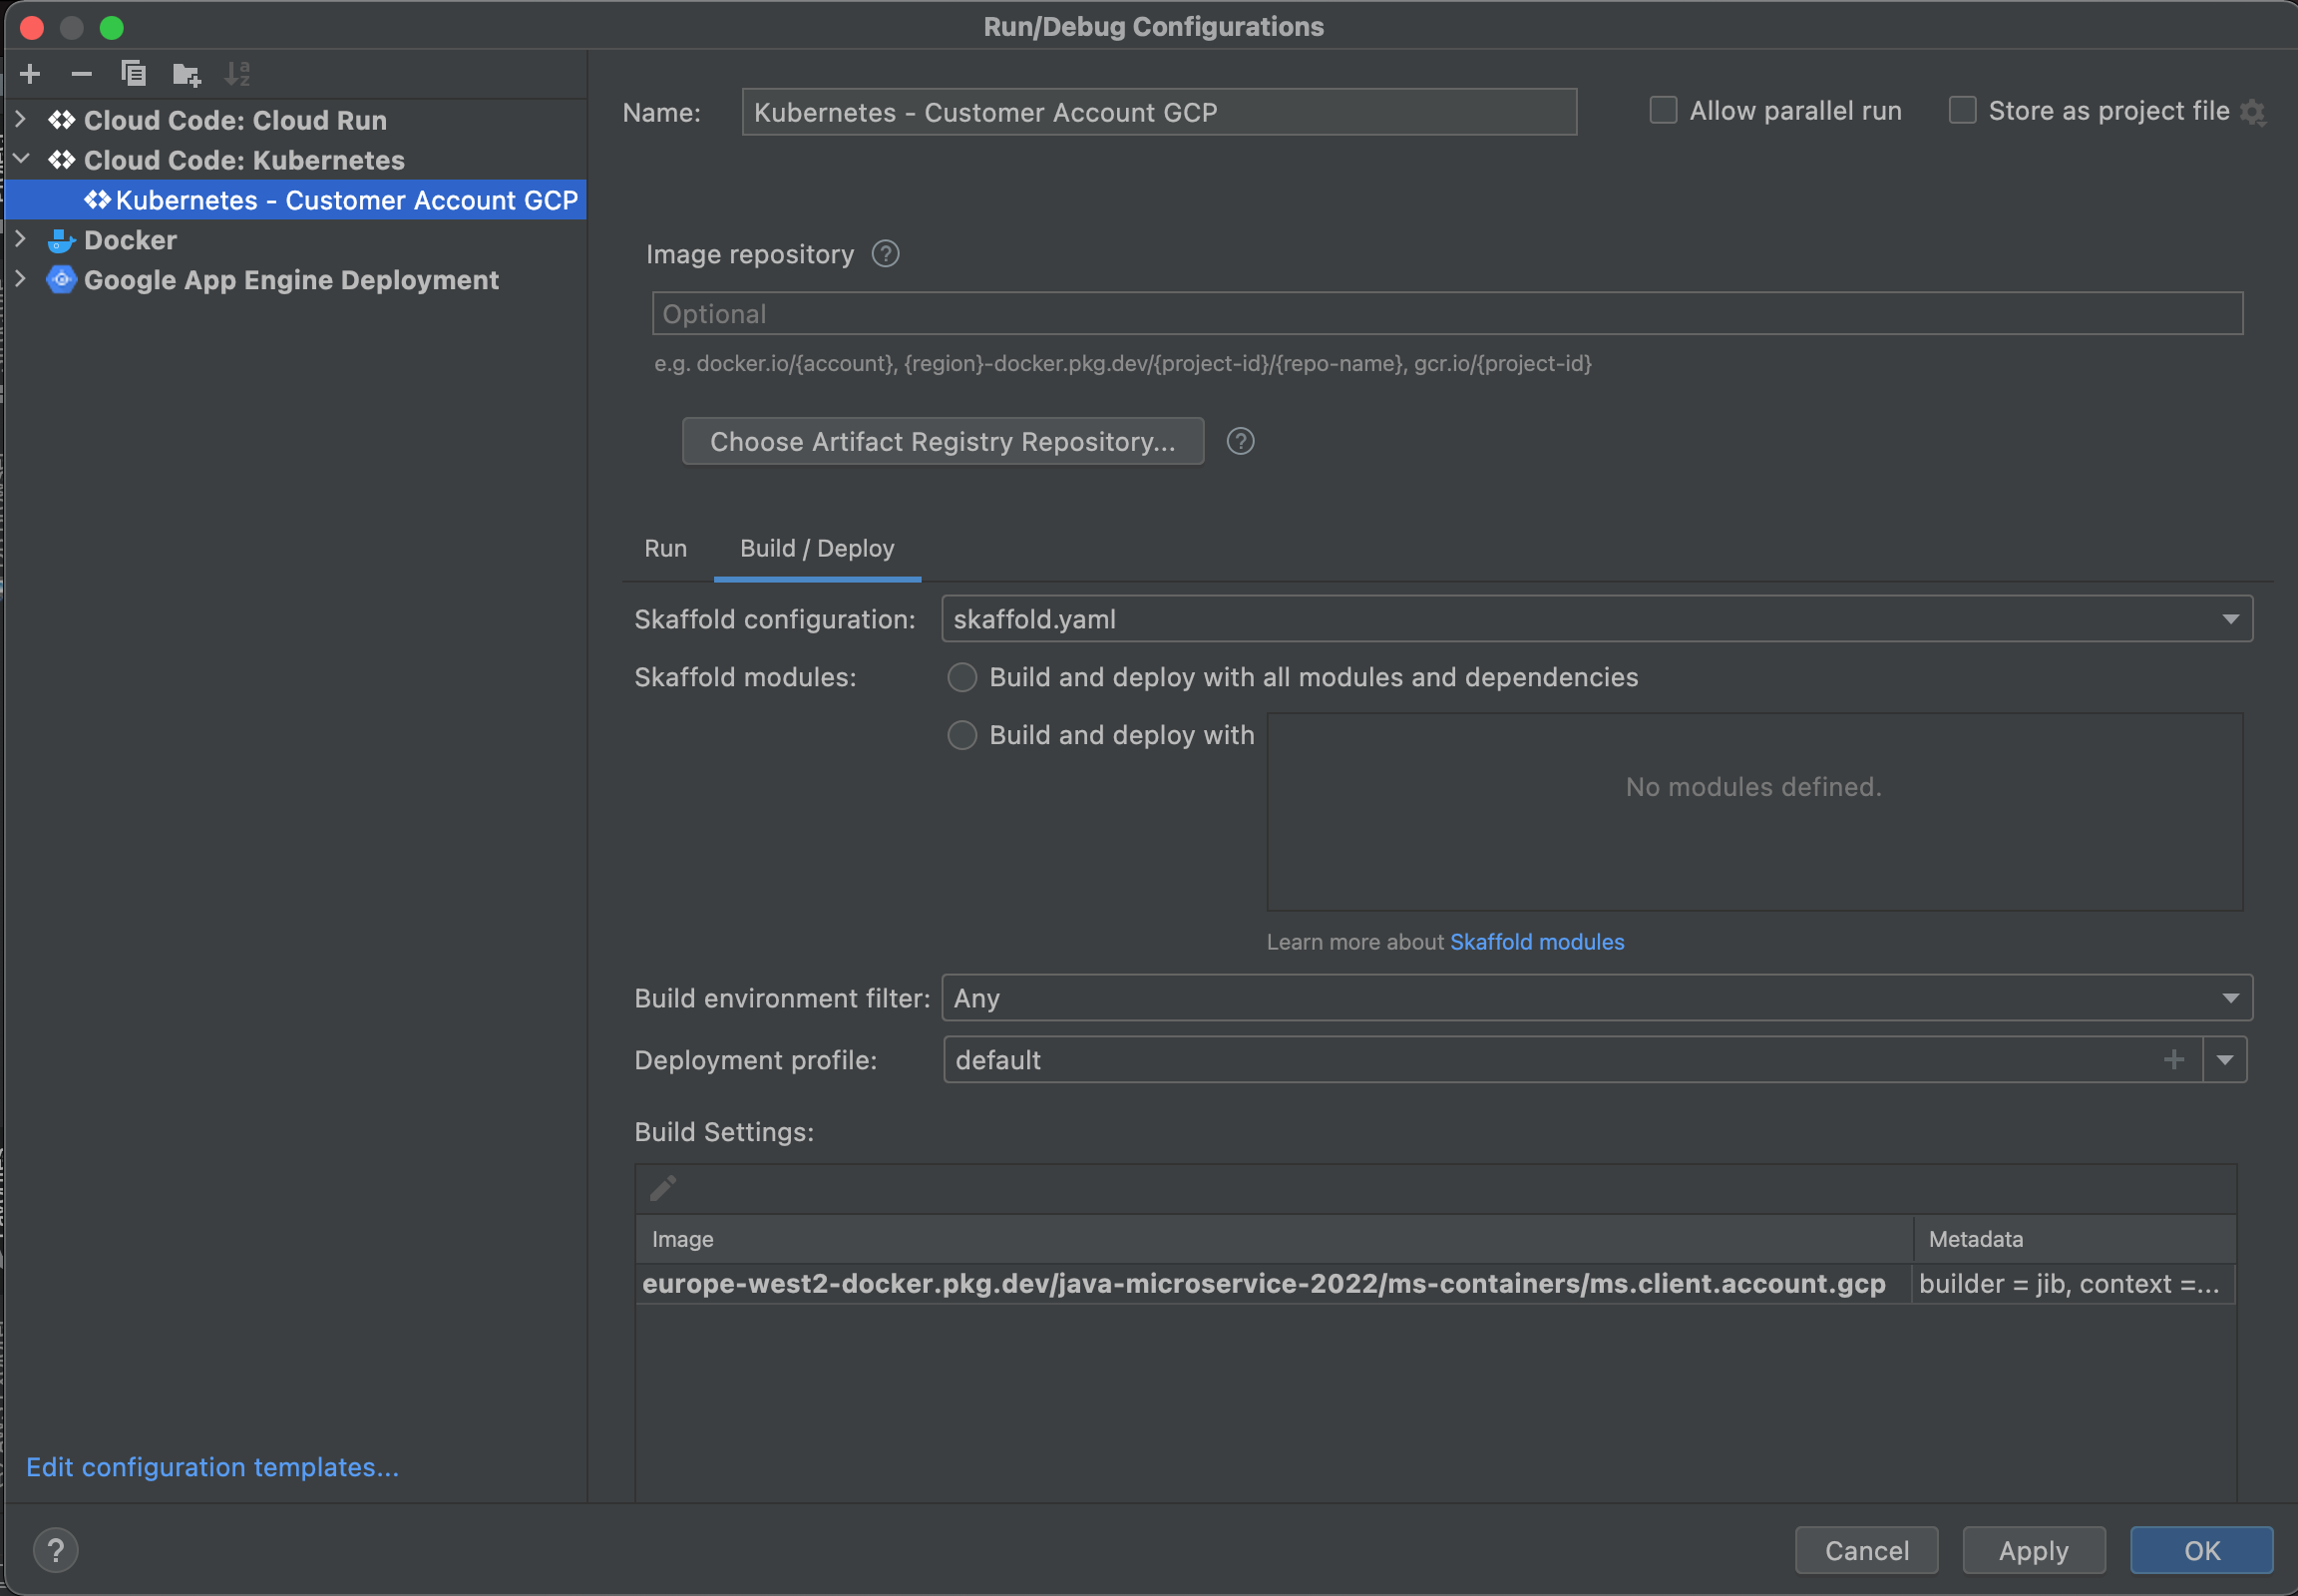
Click the "Initialize" button in the "Build/Deploy" tab.
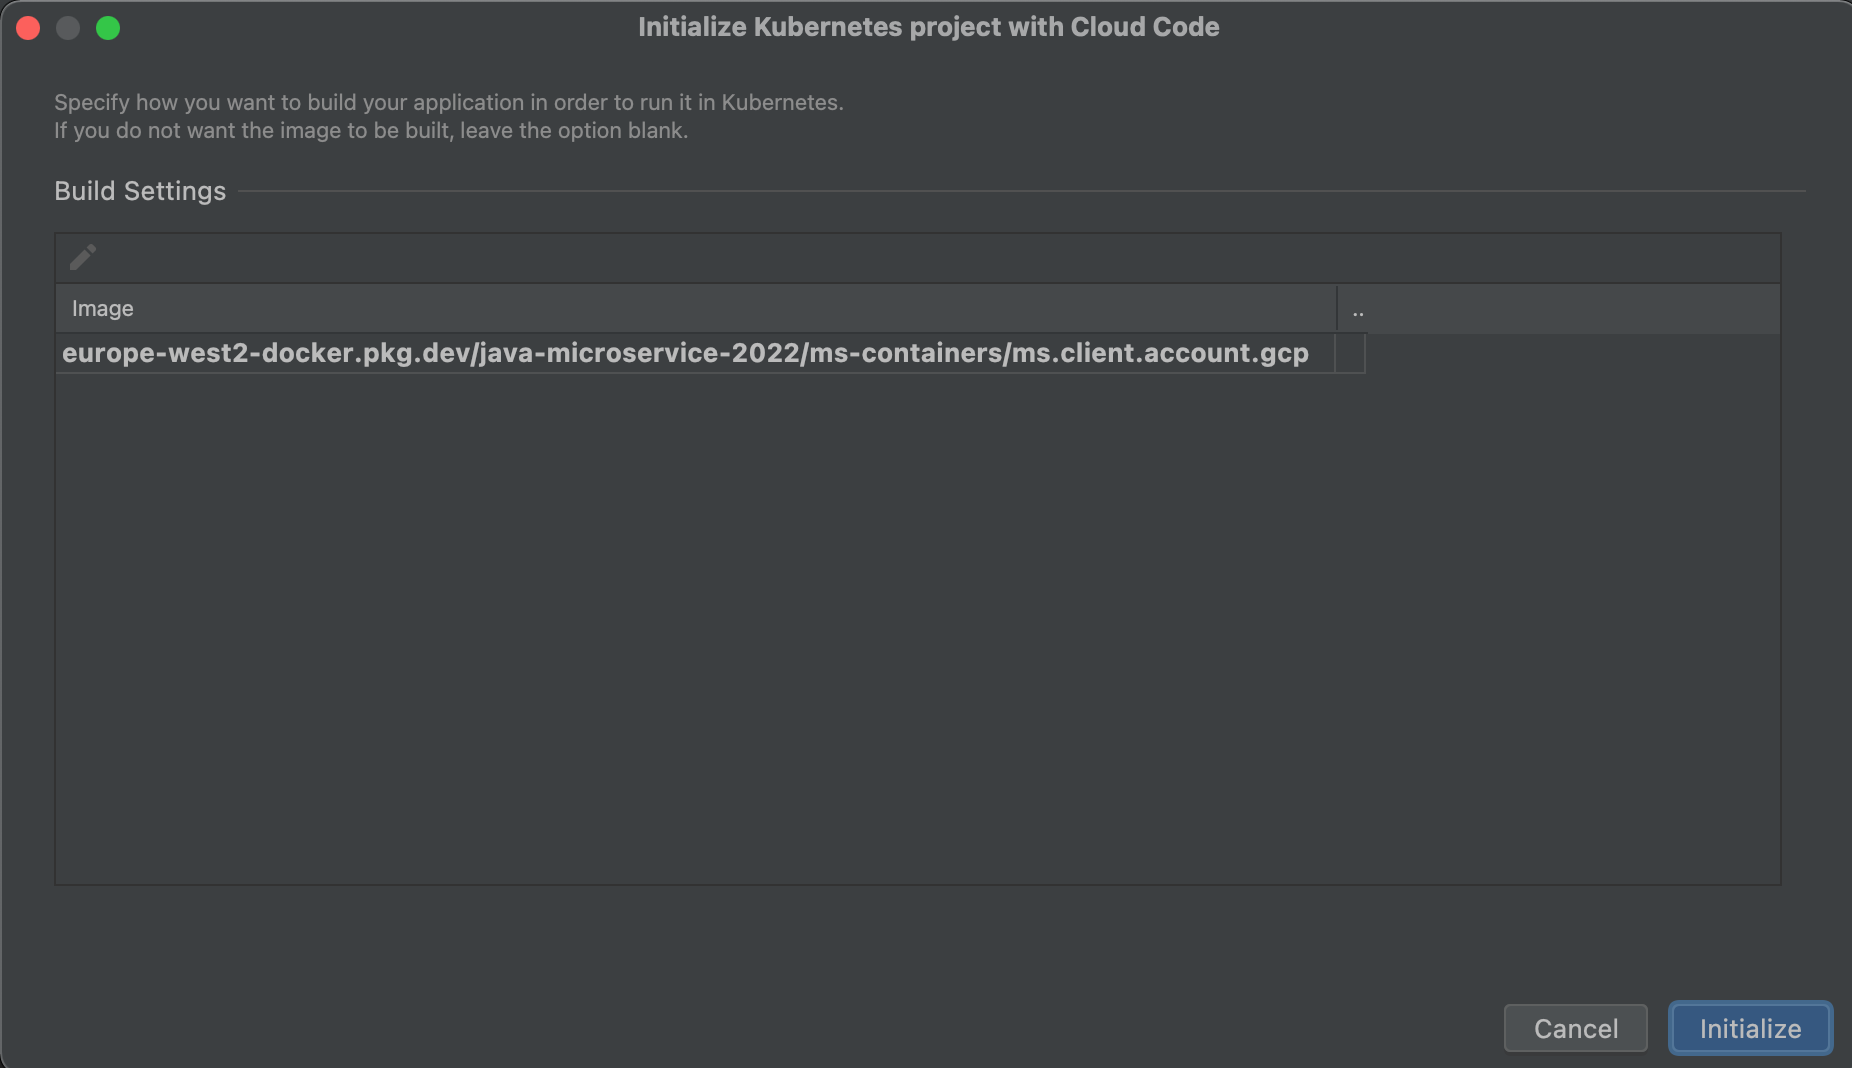
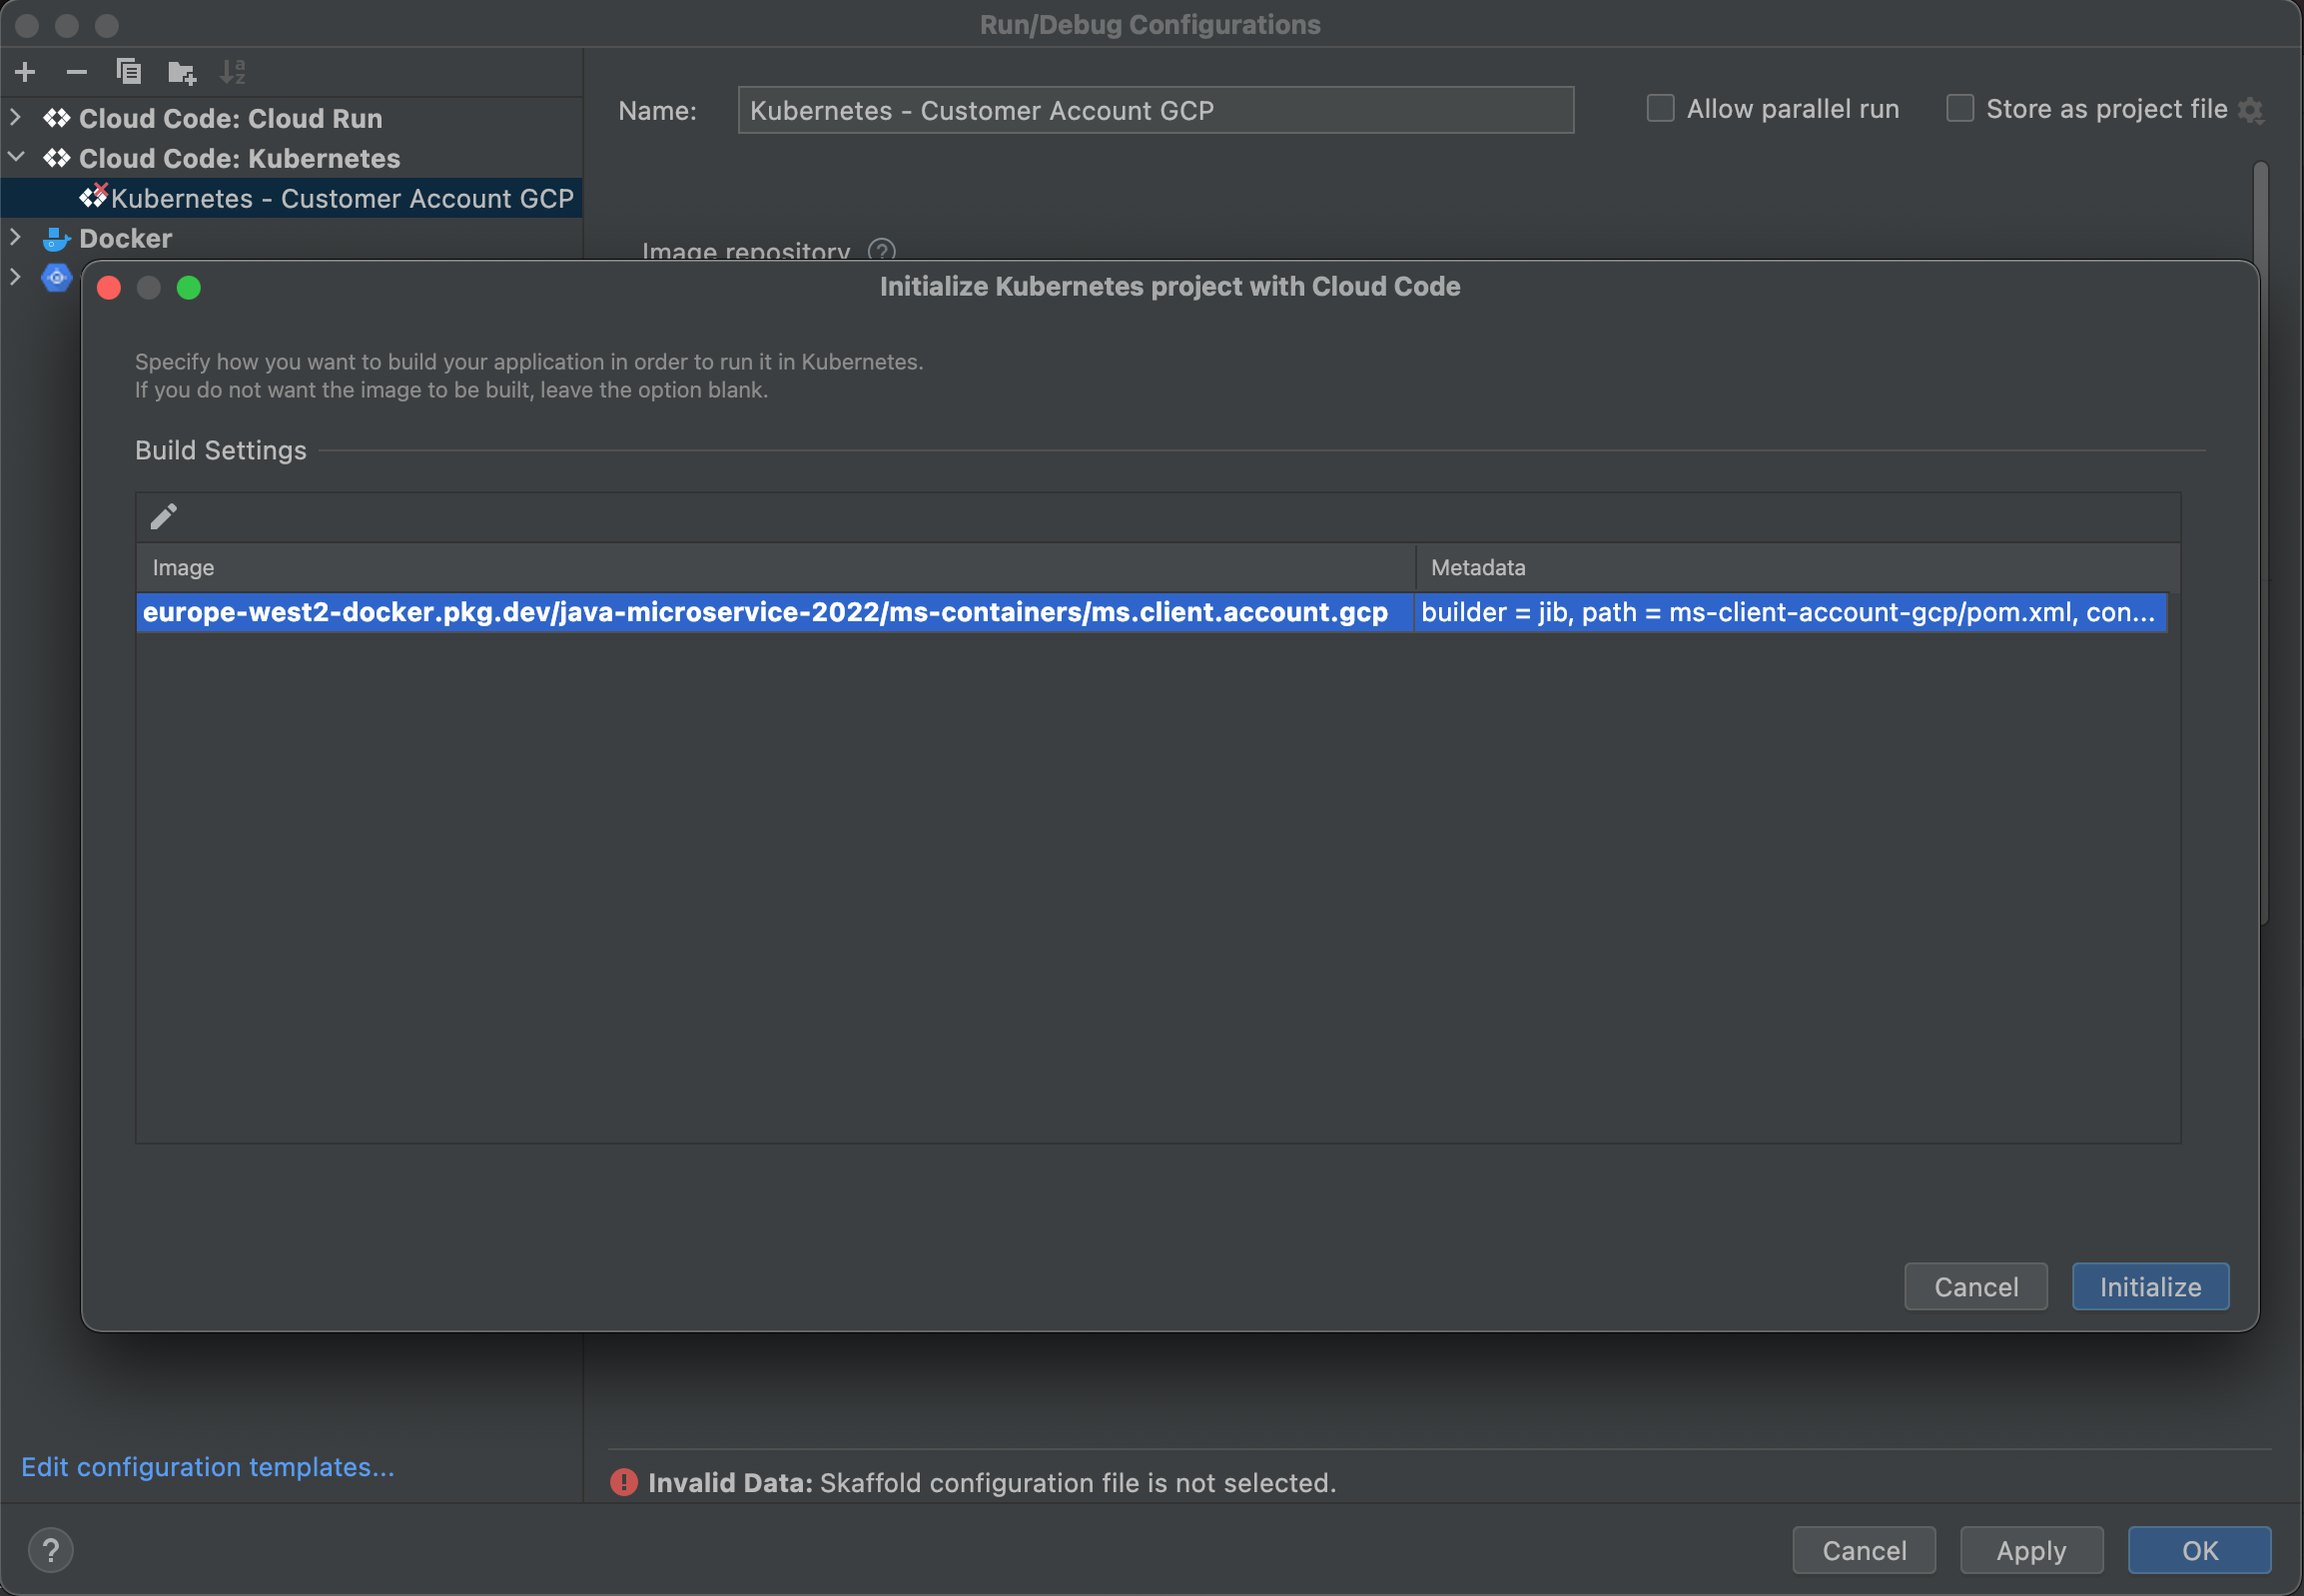
Click the "pen" icon under Build Settings.
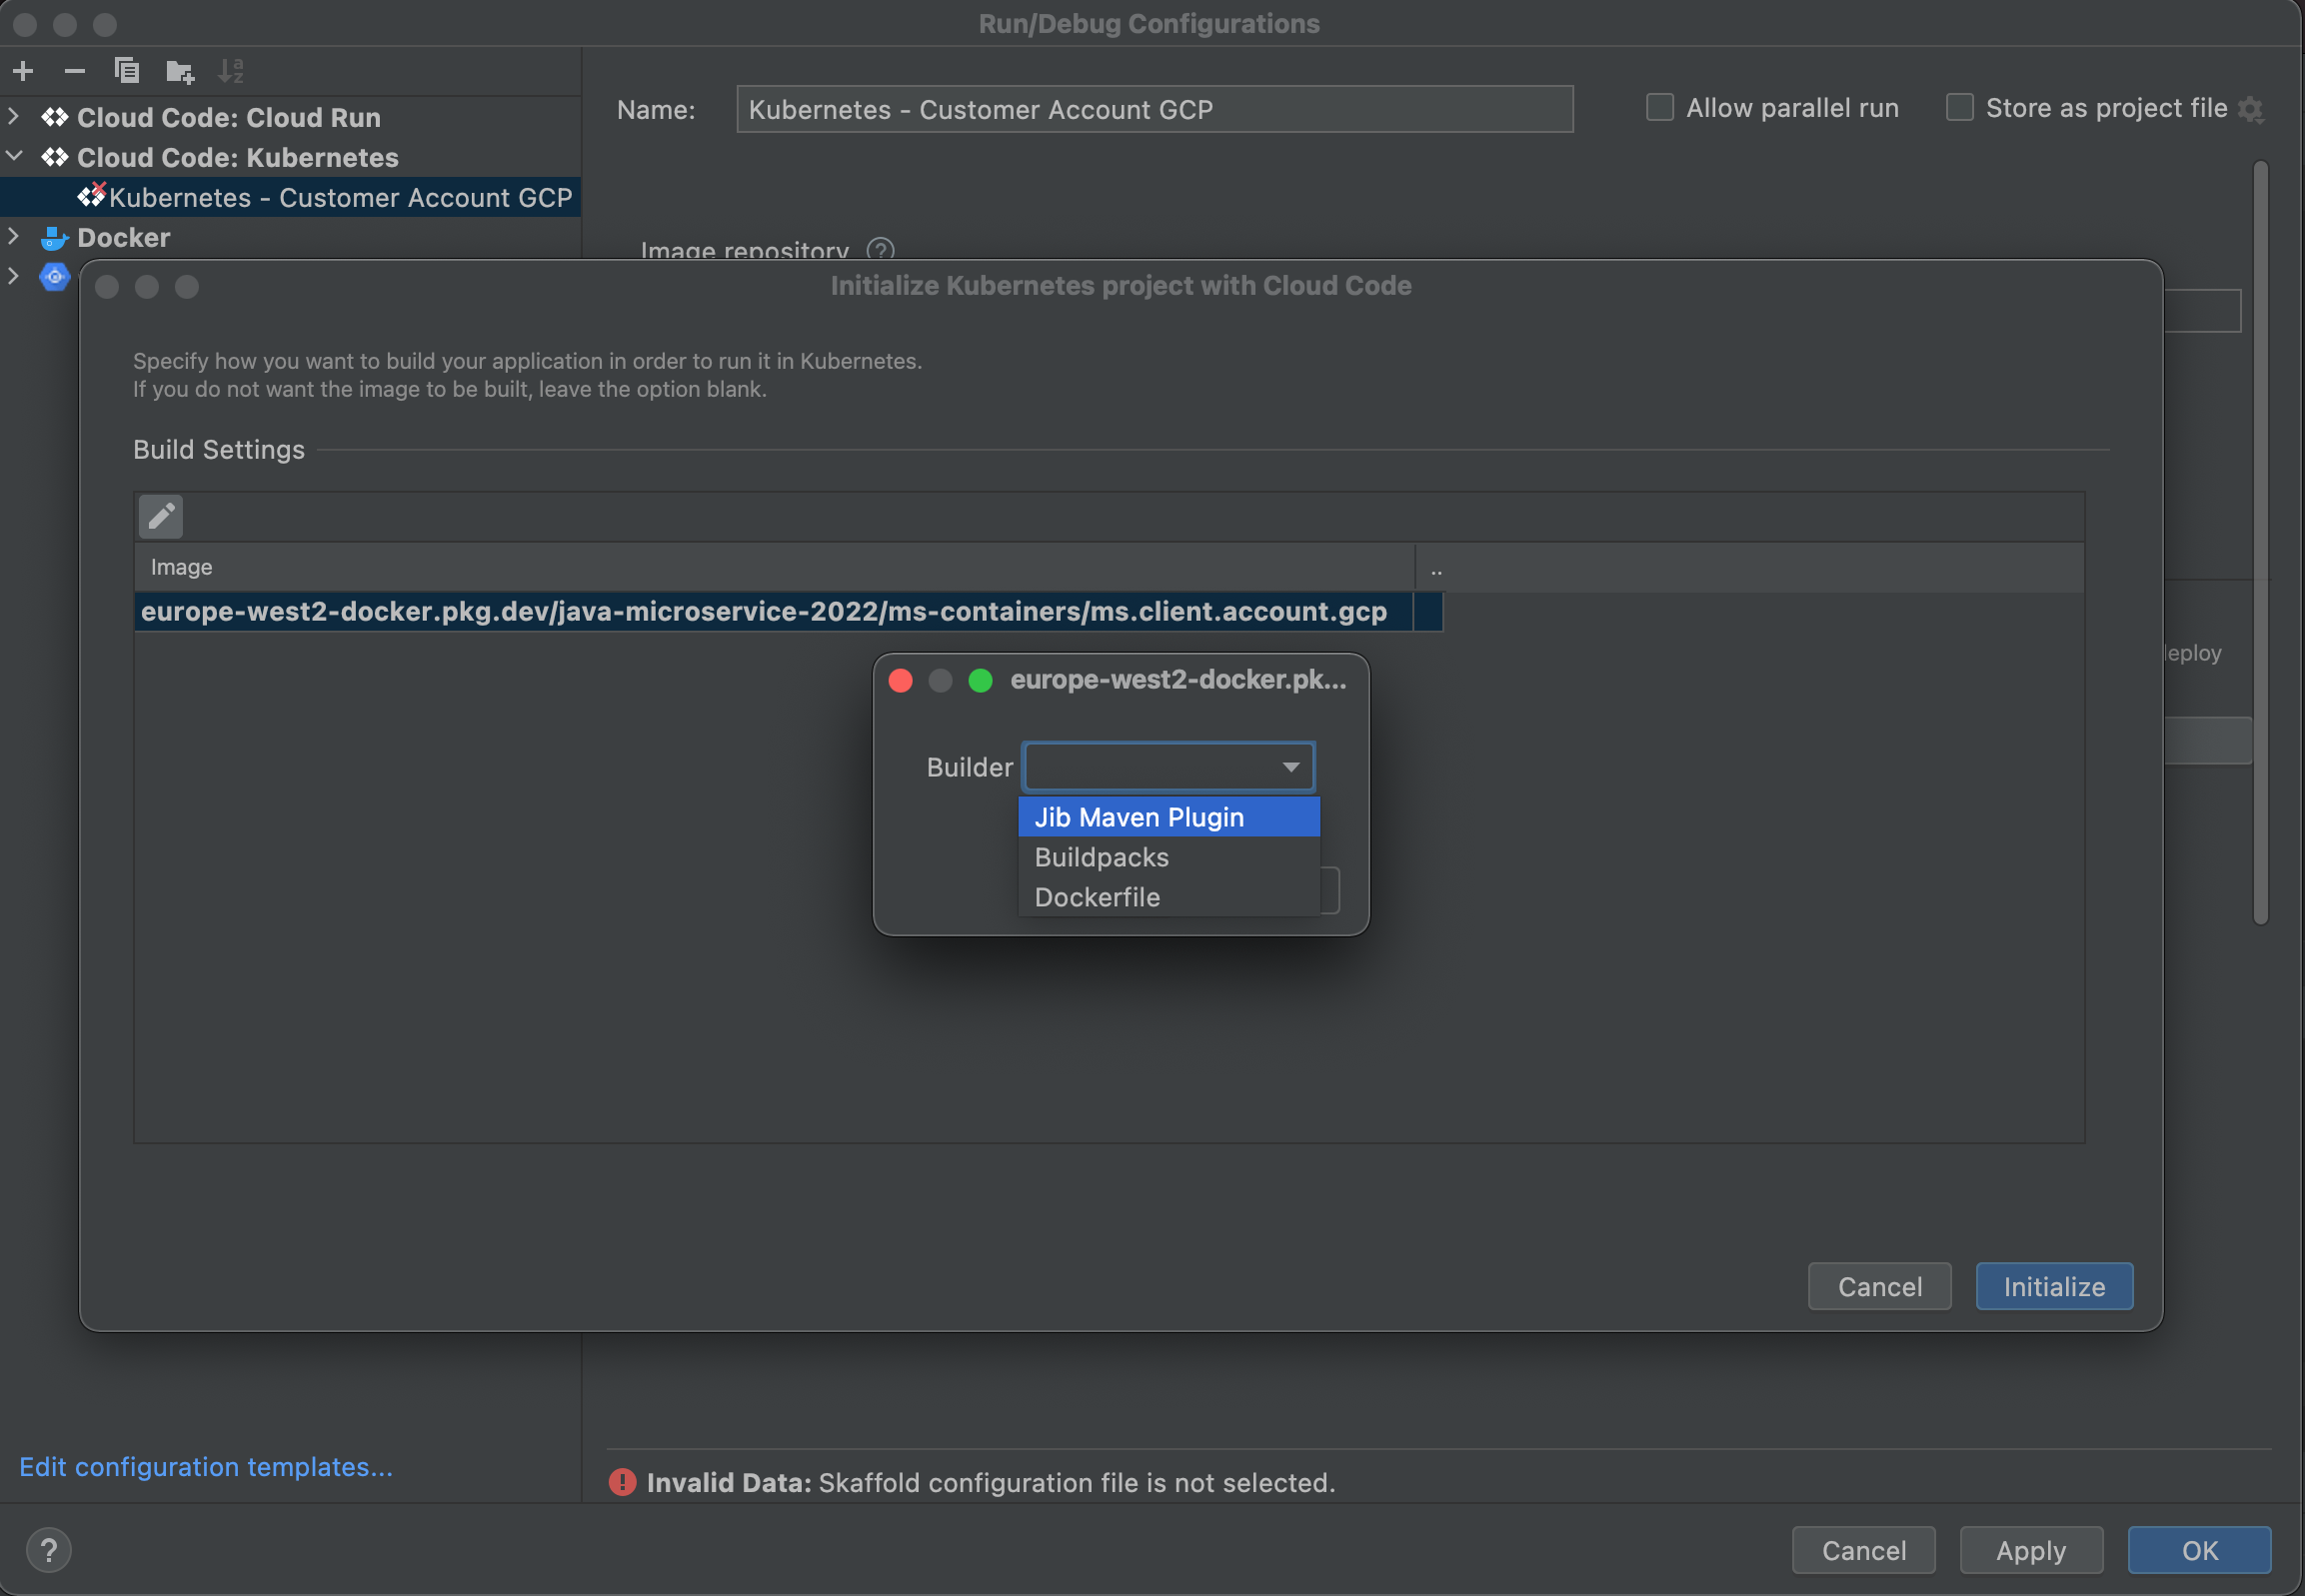
Select Jib Maven Pluin from the Builder dropdown list and click the "OK" button.
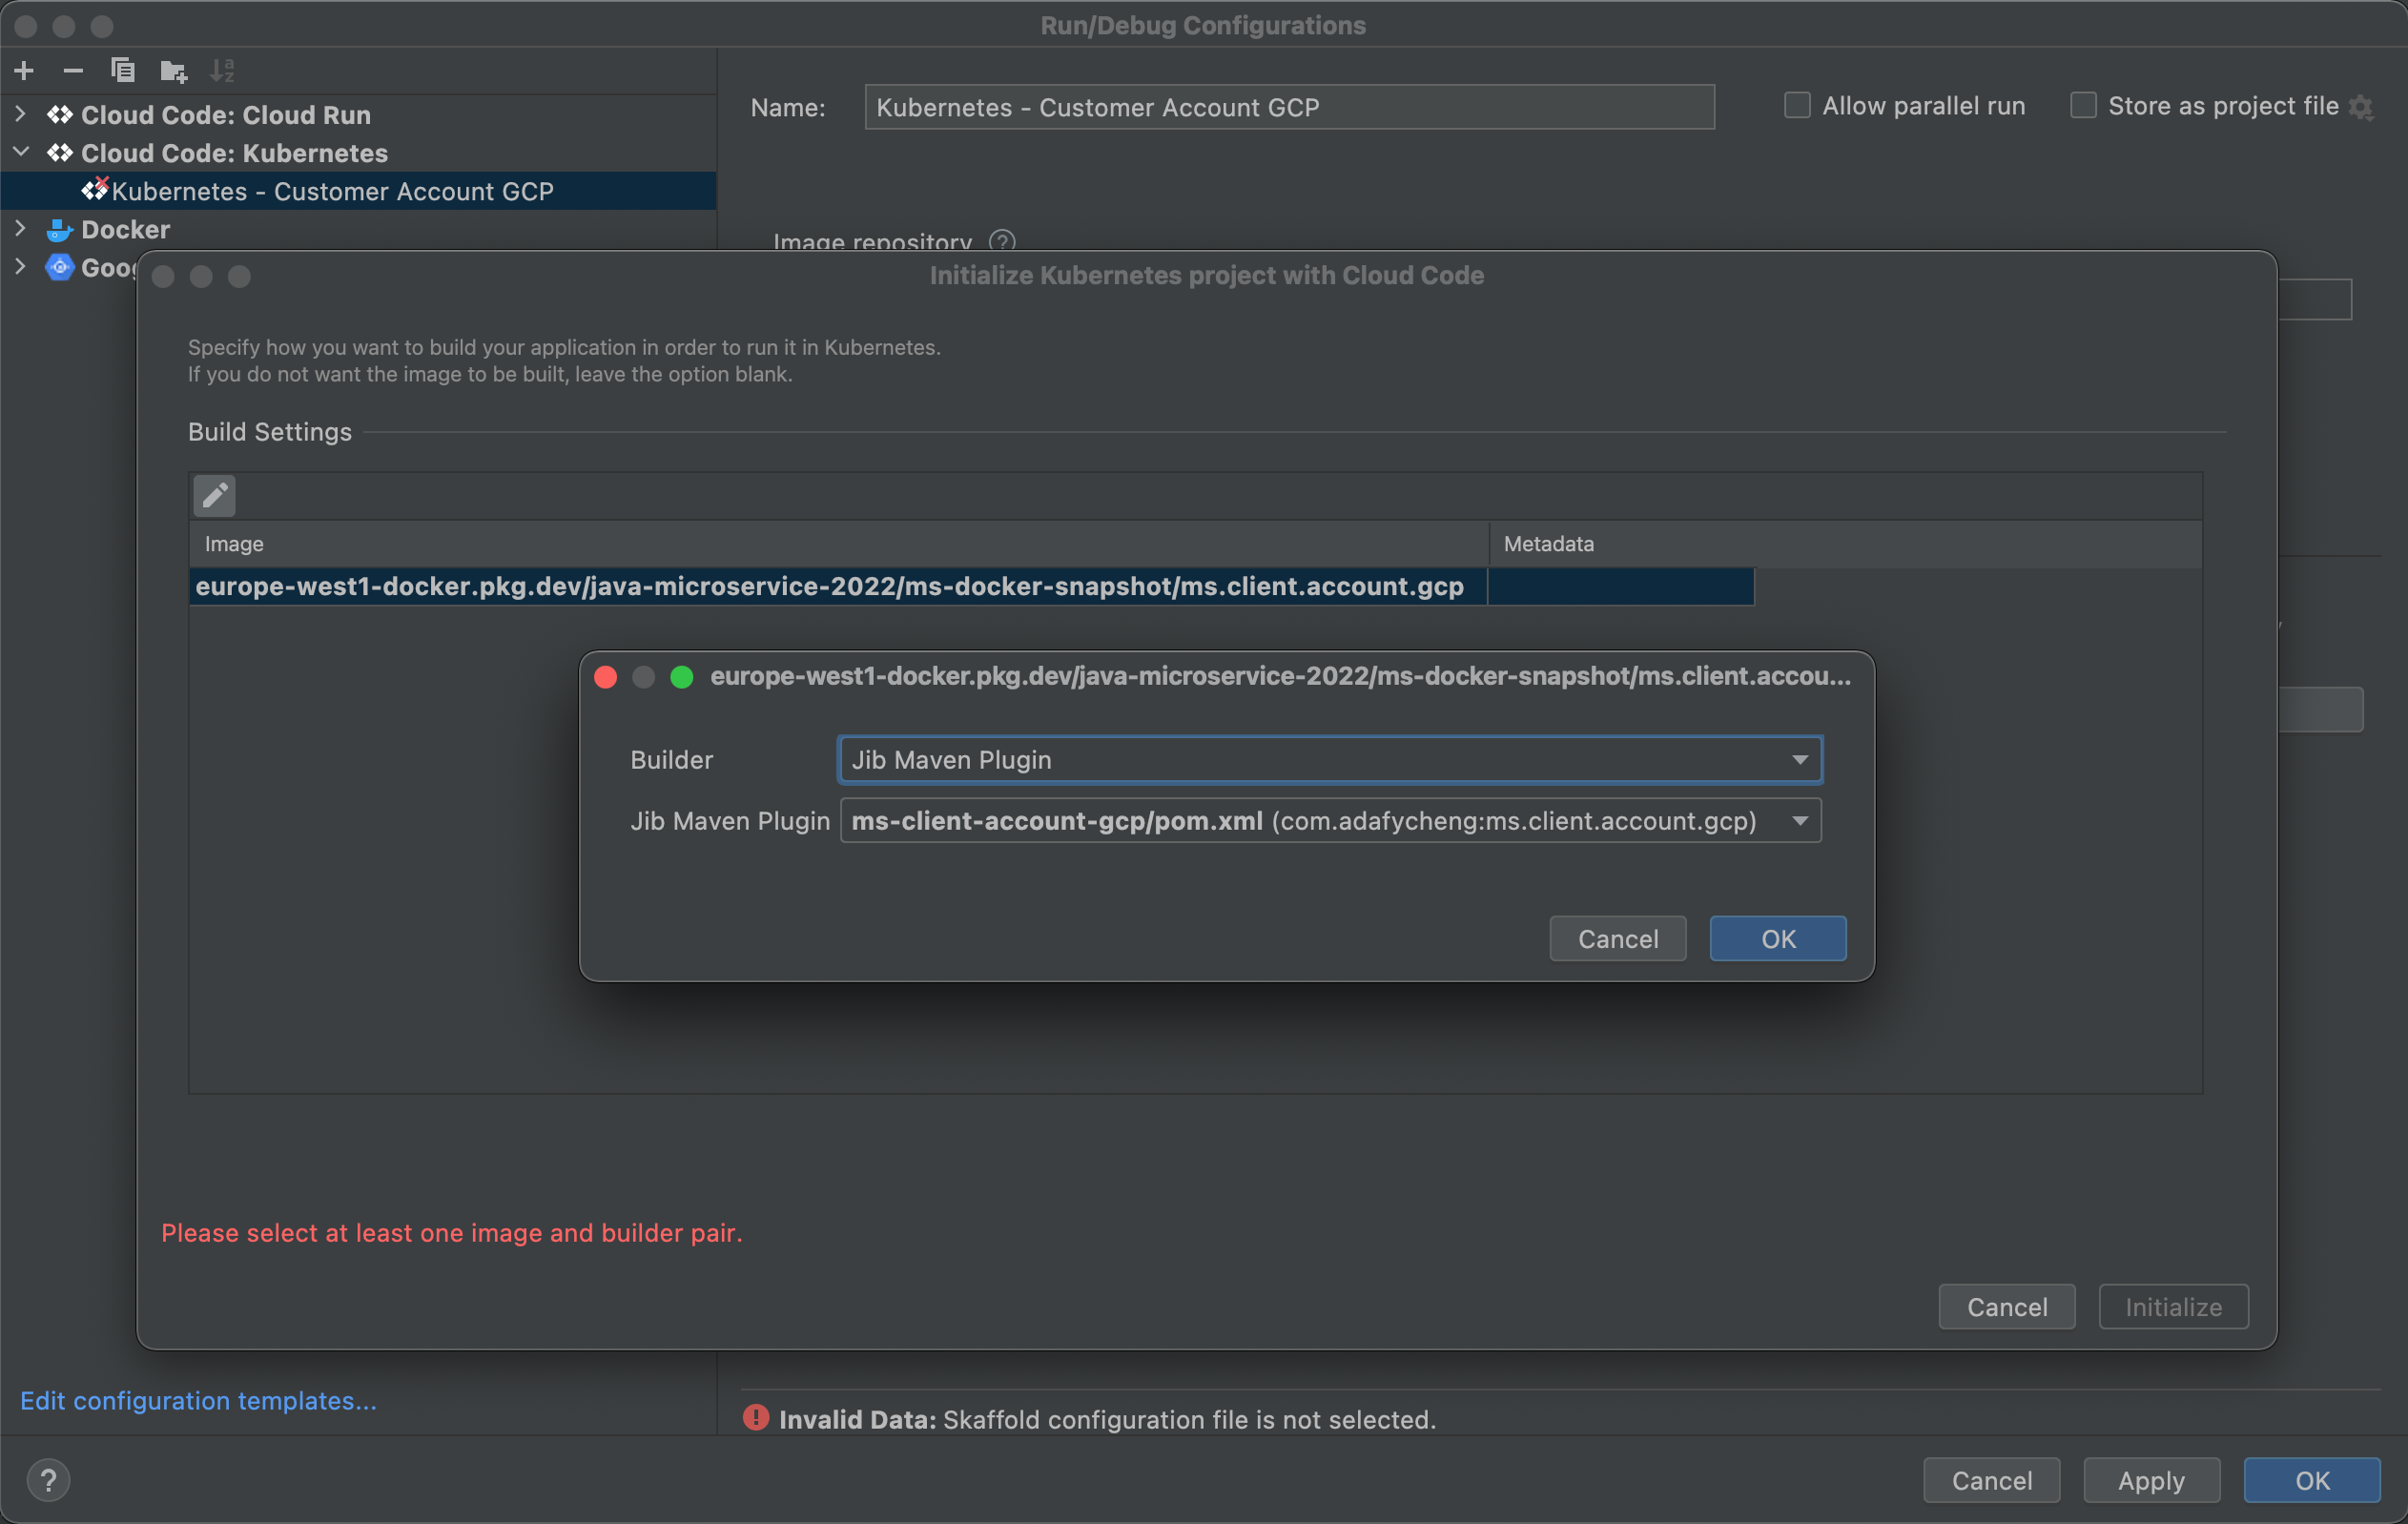
Click the "Initialize" button.
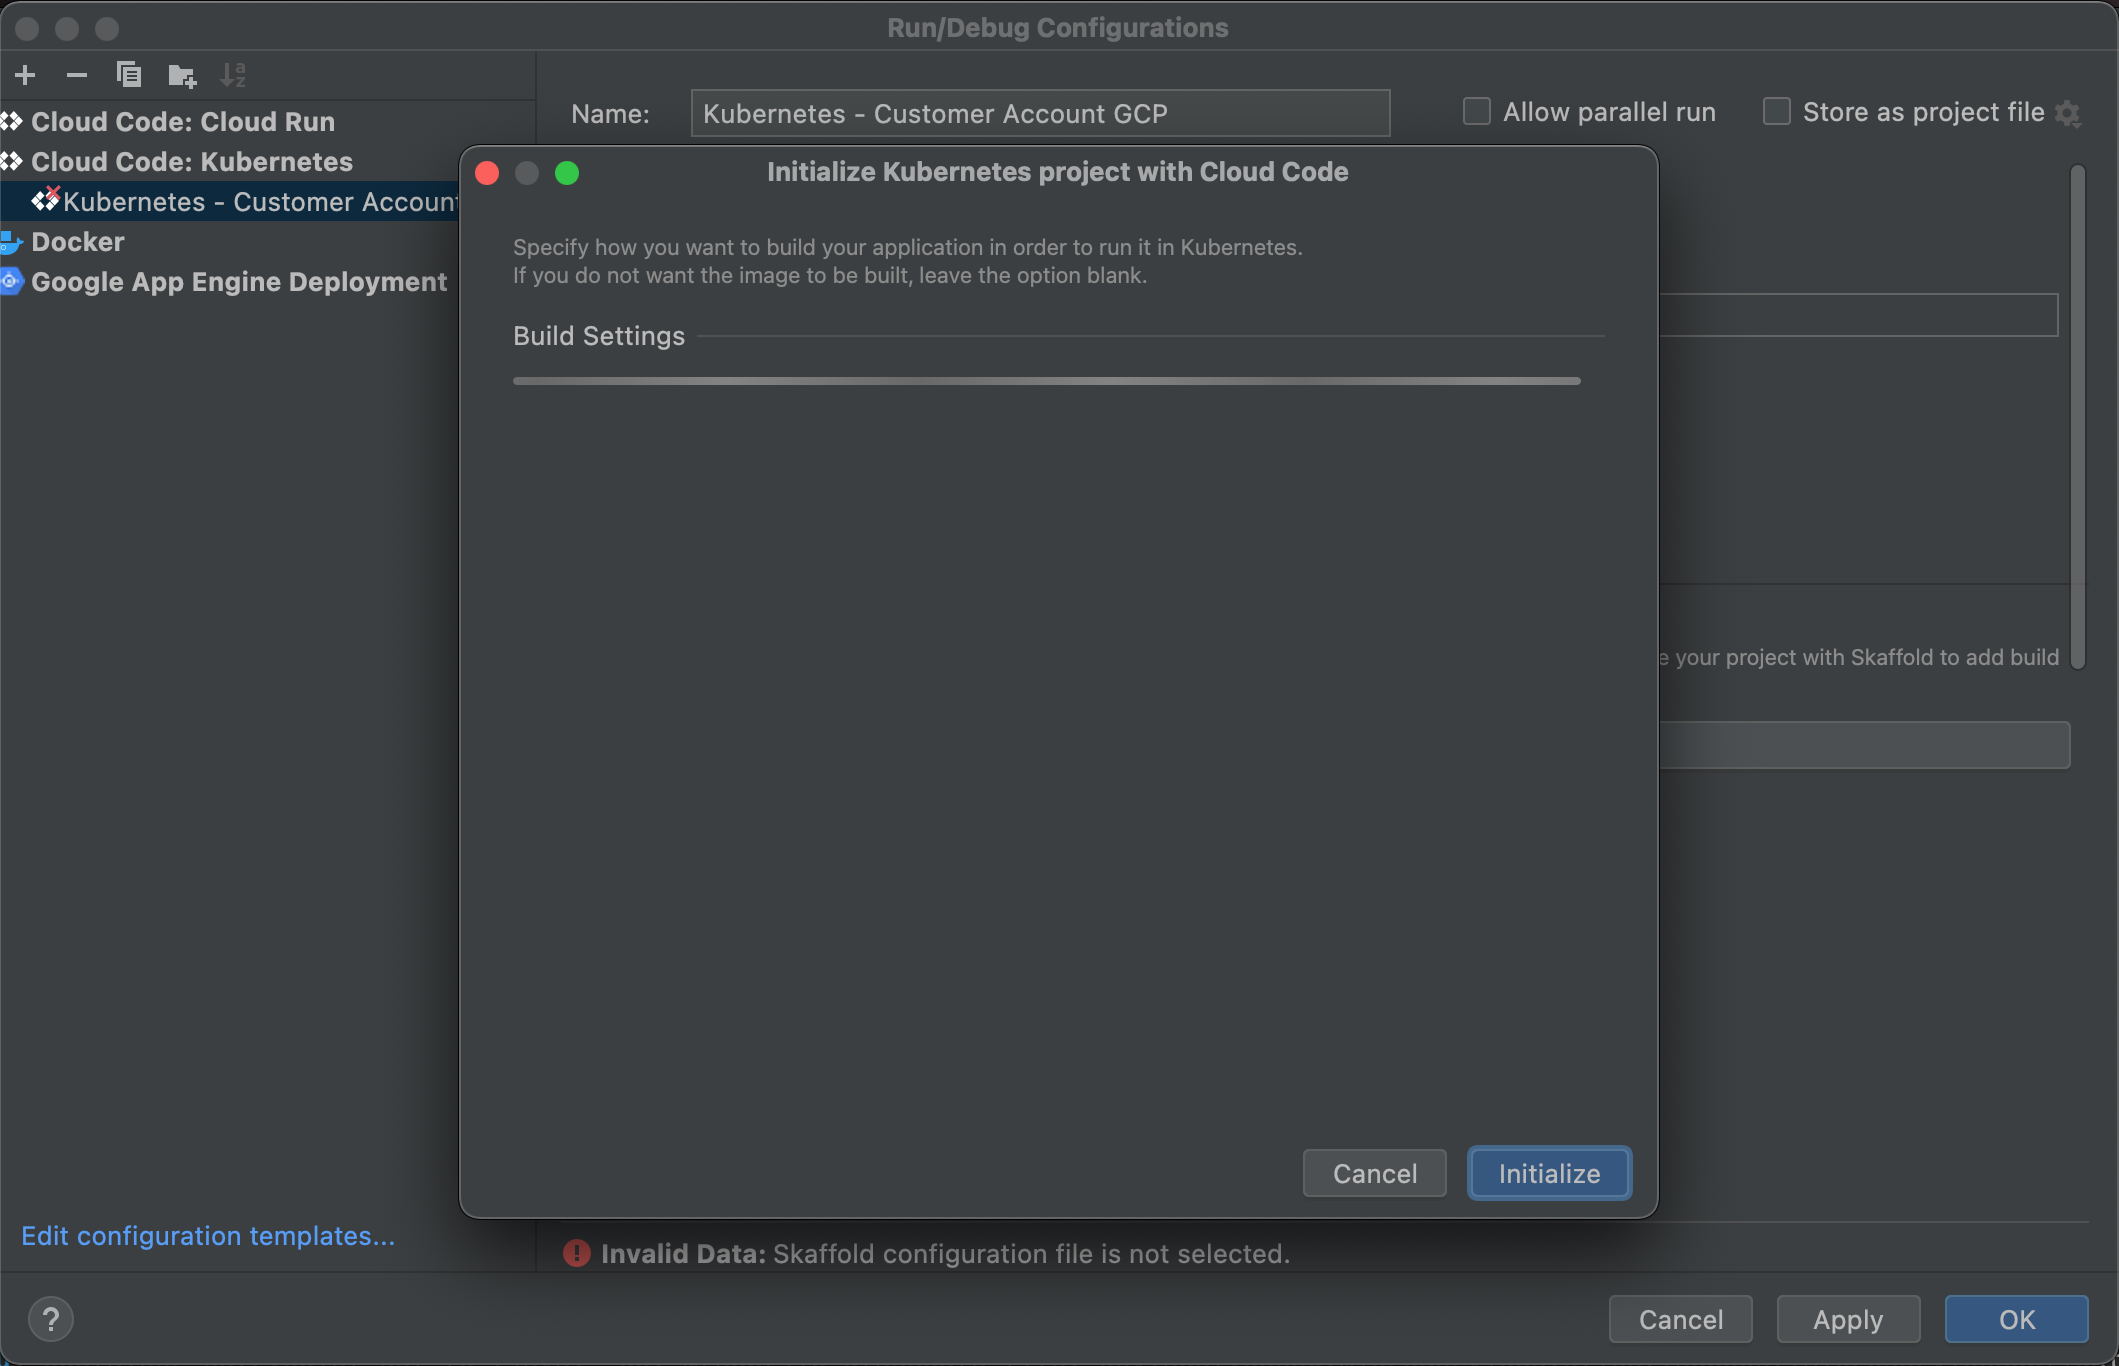
A skaffold.yaml file will be generated at the Project Root Directory.
Click the "Run" tab.
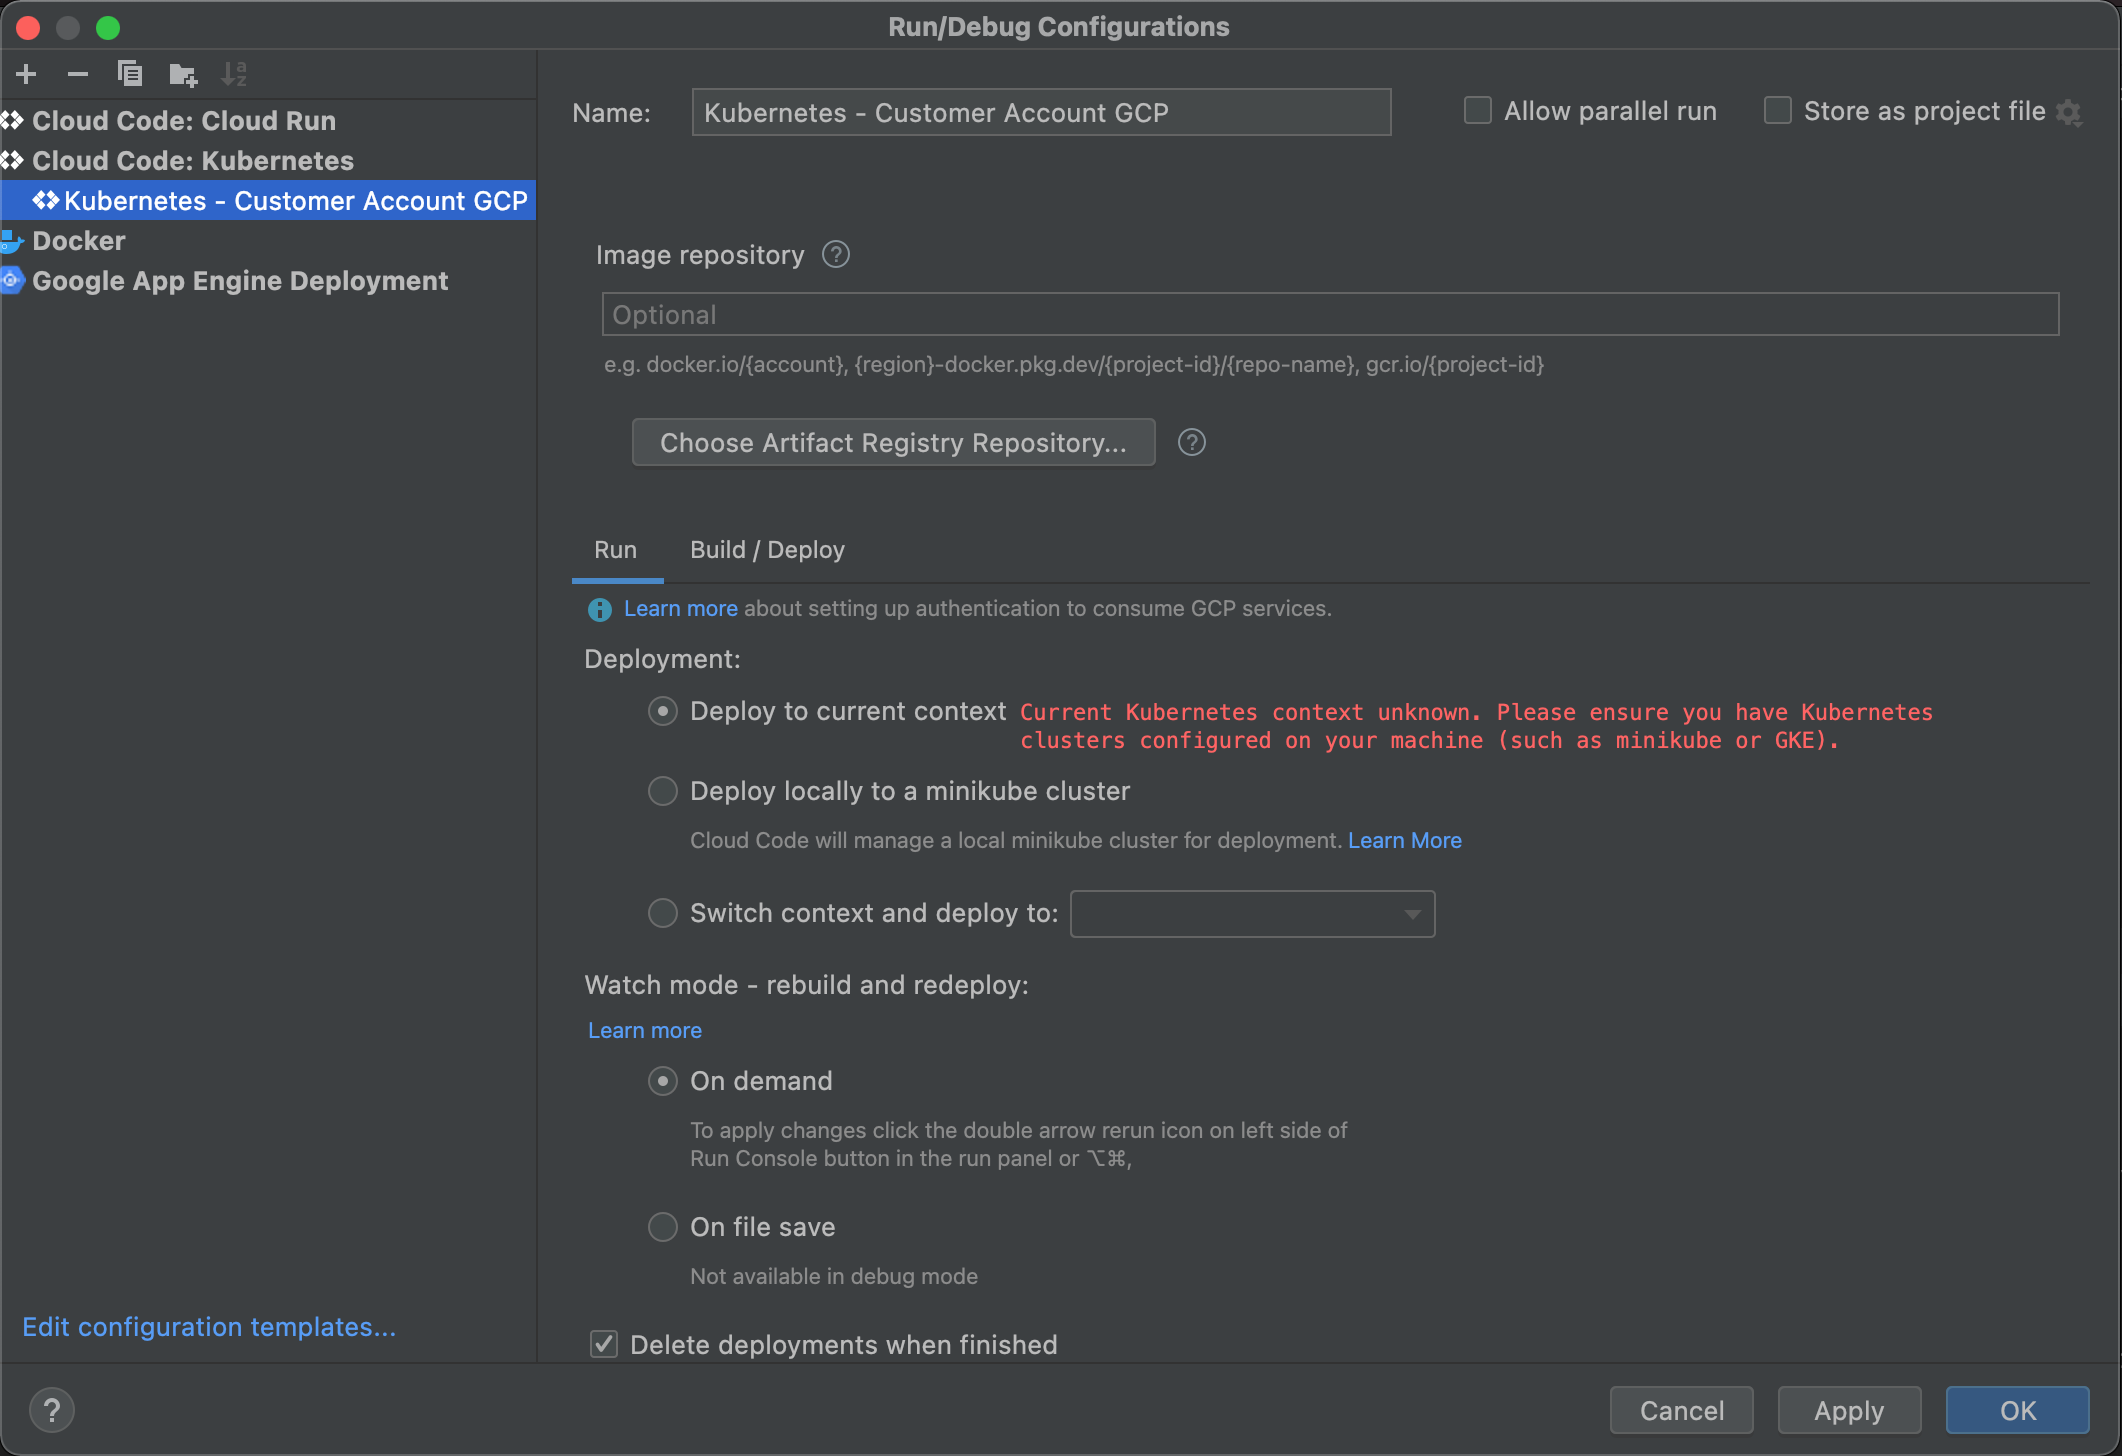
An alert message "Current Kubernetes context unknown. Please ensure you have Kubernetes clusters configured on your machine (such as minikube or GKE)." in red in shown.
To fix this problem, get authentication credentials to interact with the cluster by typing the following command in Terminal of InteglliJ.
gcloud container clusters get-credentials CLUSTER_NAME- Replace CLUSTER_NAME with your GKE cluster name.
The problem should then be solved.
Please note that the granted credentials are valid in this session only. If your session to Google Cloud is lost, you have to get the credentials again.
At last, make sure the option "Delete deployments when finished" is unchecked.
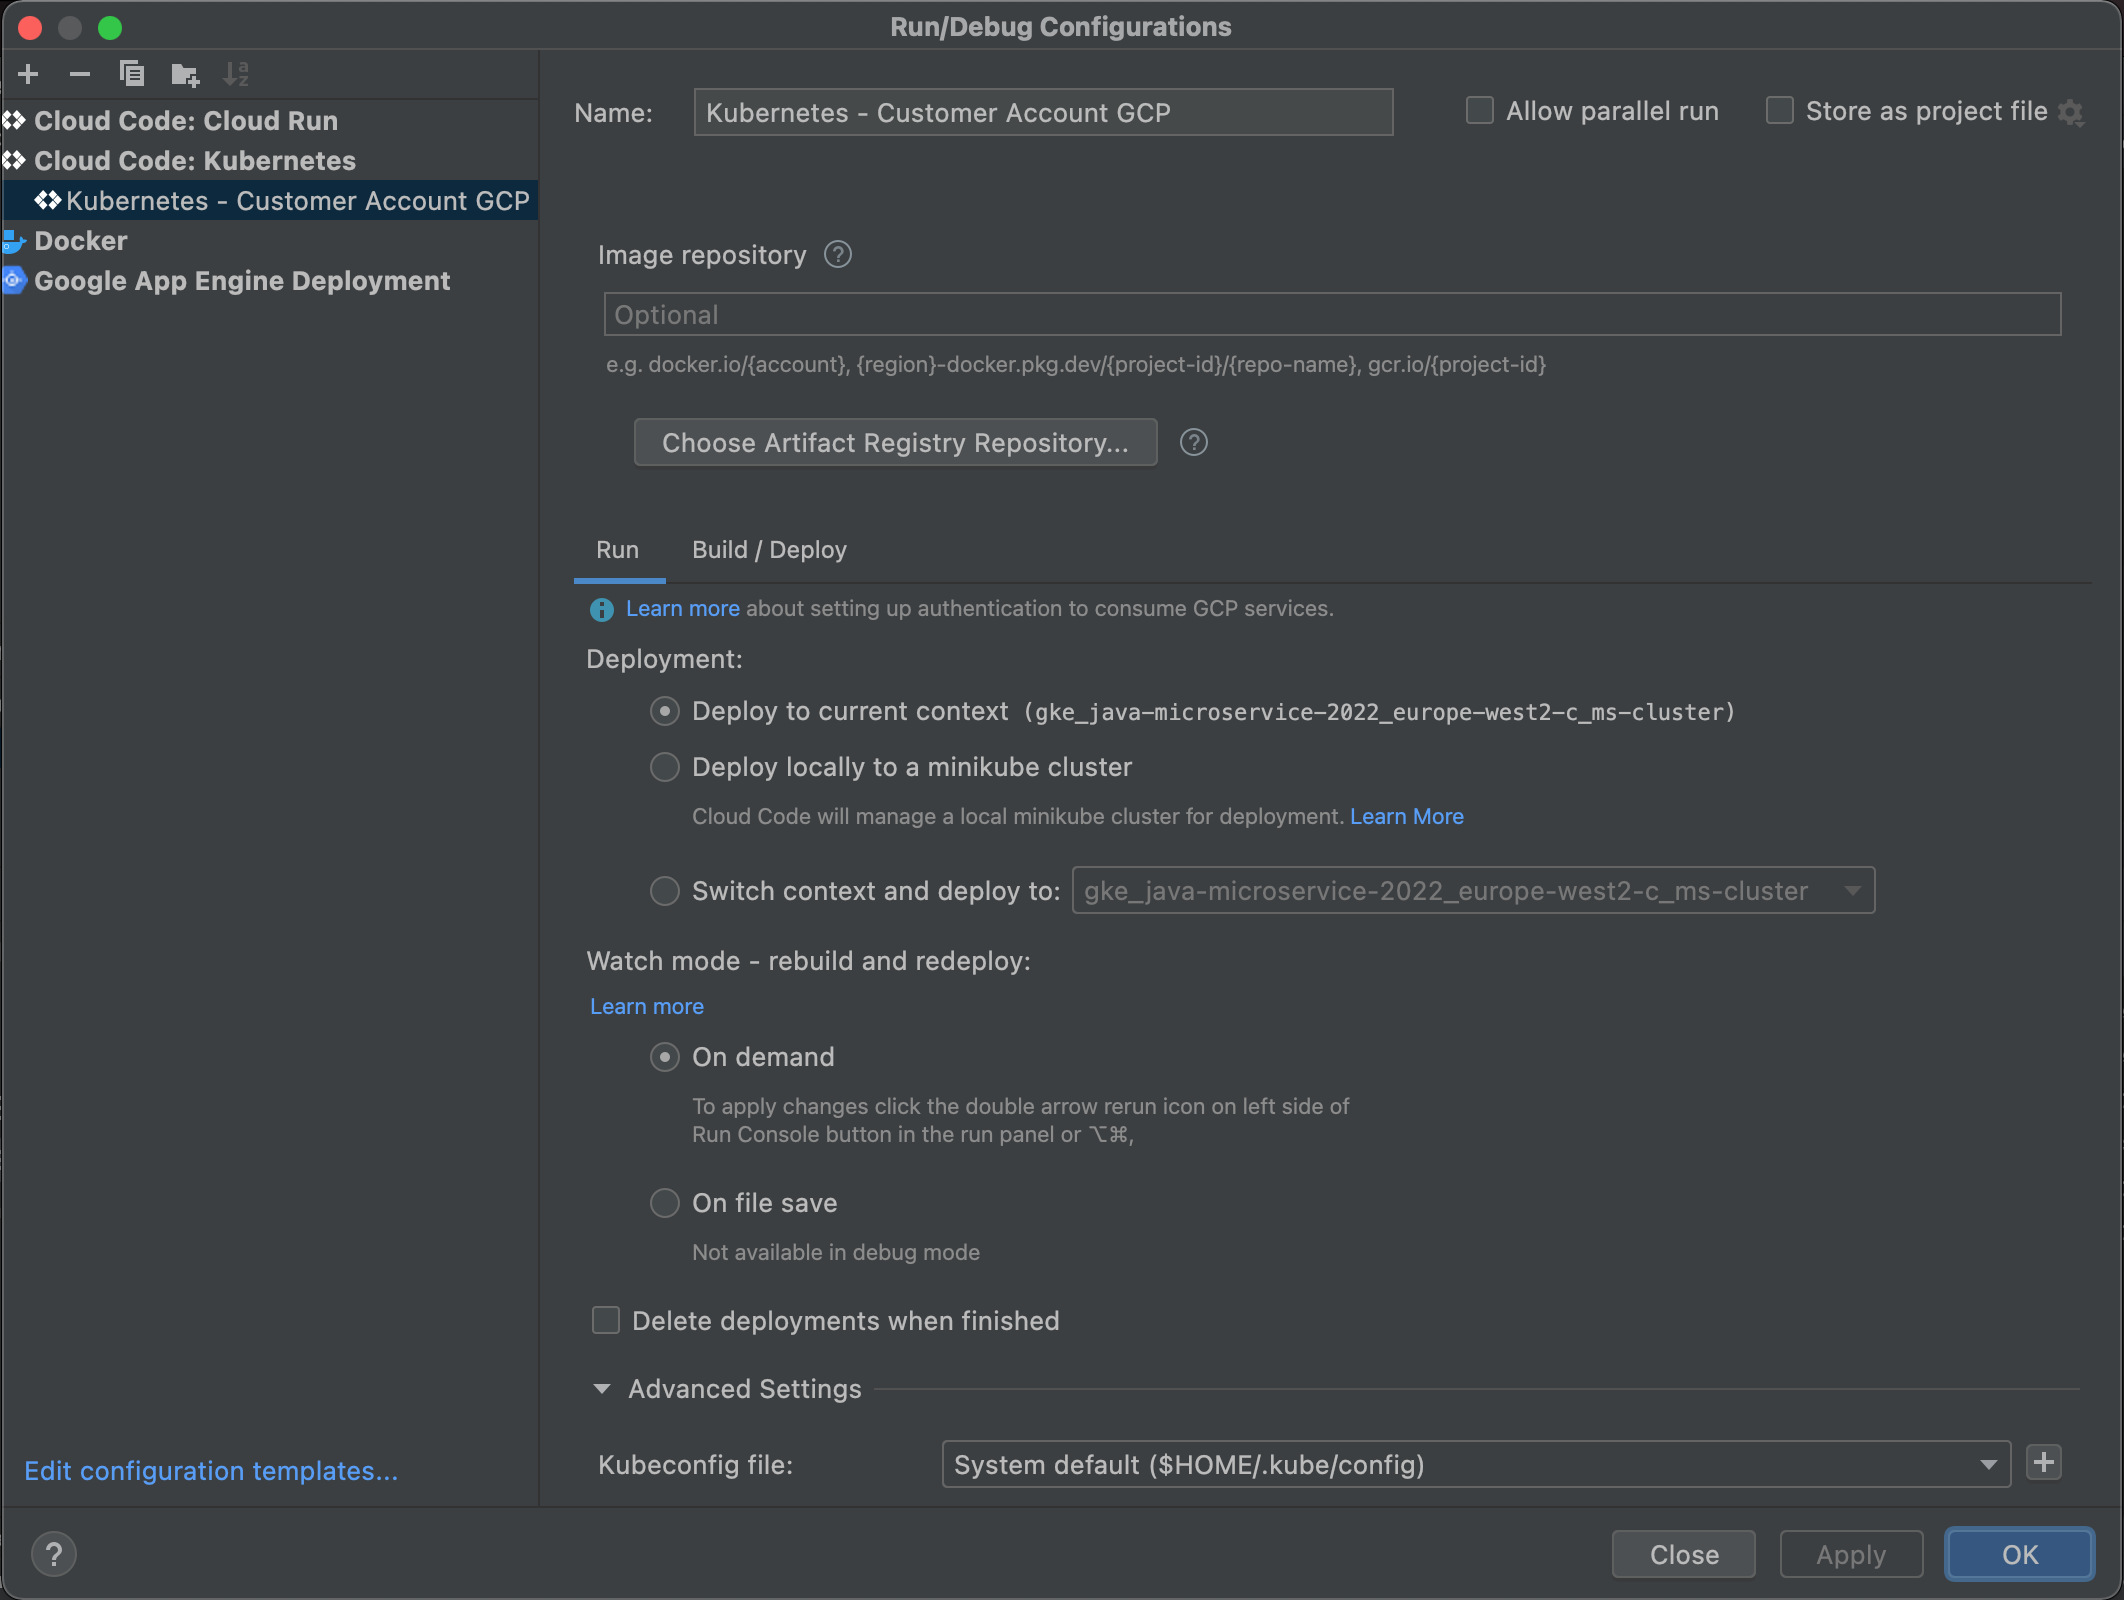
Click the "OK" button to finish the configuration.
- In case of any changes of the deployment.yaml and service.yaml files, delete skaffold.yaml file generated and repeat steps 5-9 to generate the skaffold.yaml file again.
Deploy to GKE
Click the "Run" button of the Cloud Code: Kubernetes configuration just created.

The deployment process should be started.
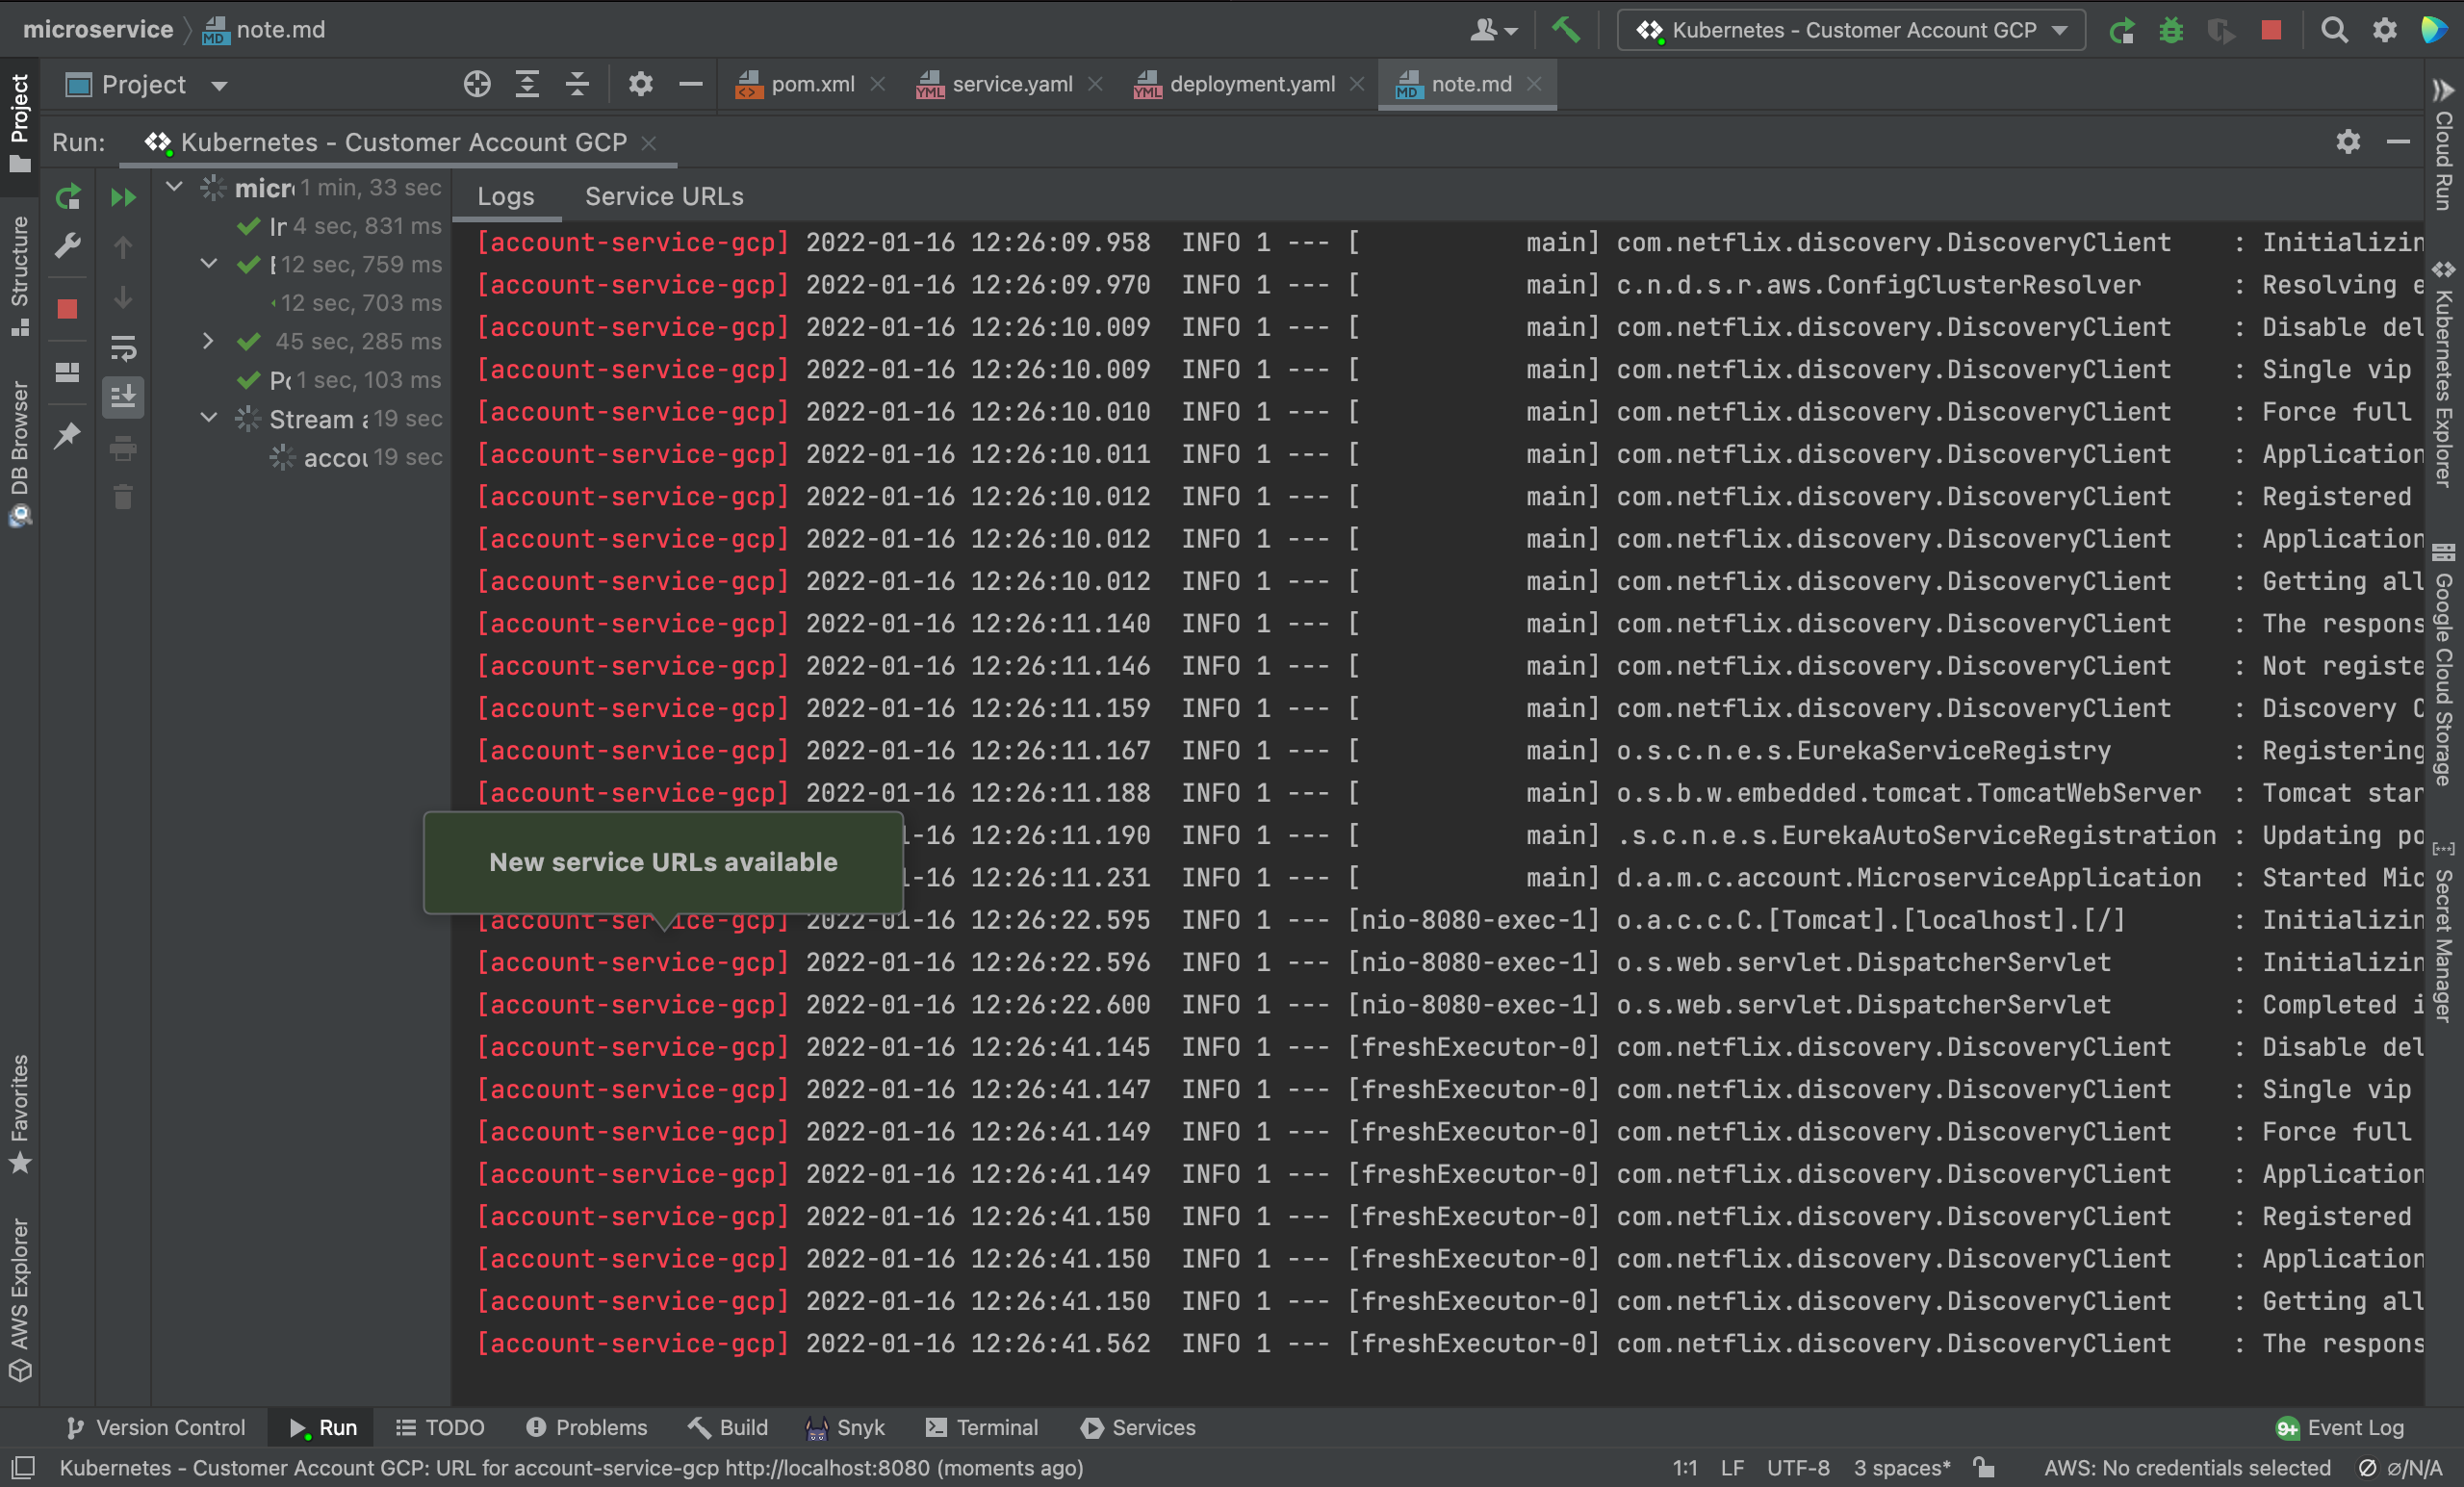
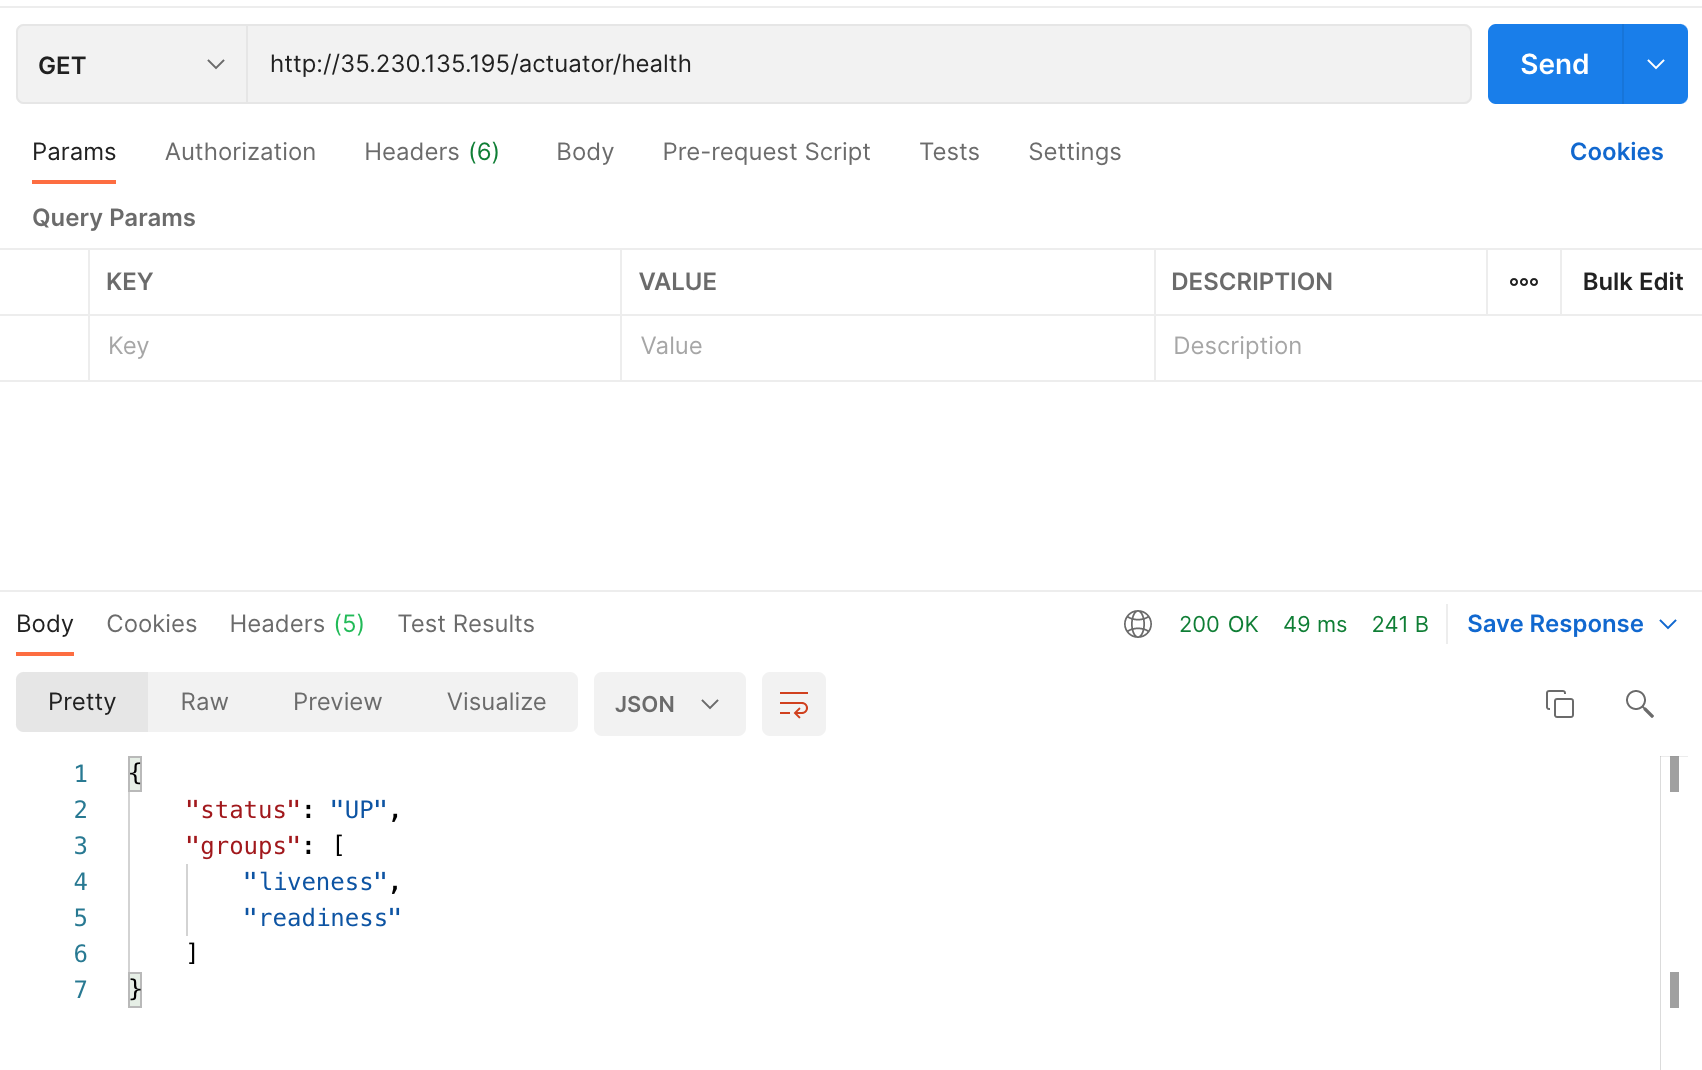
Once the deployment is finished, test locally using the health check endpoint provided by Spring Actuator.
http://localhost:8080/actuator/health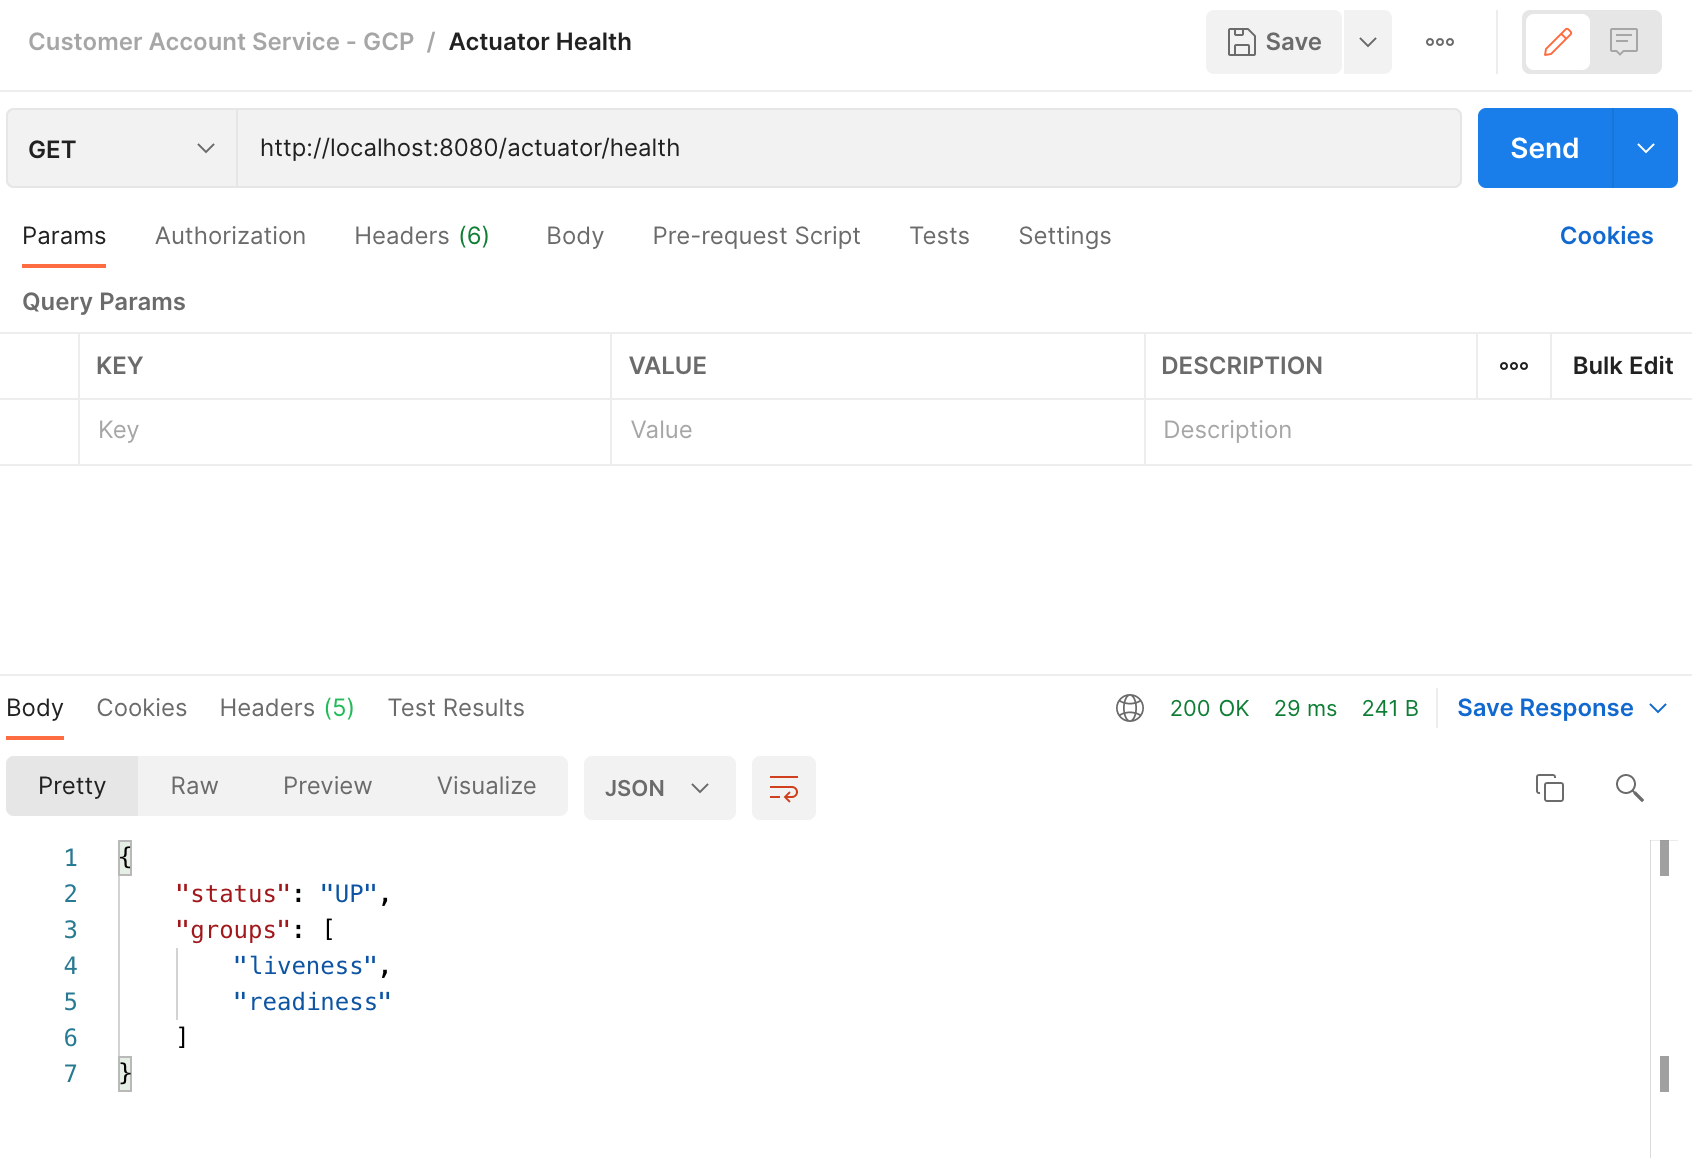
In IntelligJ Terminal, type the following command to list the services.
kubectl get service
The following command lists the service details in yaml format.
kubectl get service account-service --output yamlExpose with a target of 8080 using the following command.
kubectl expose deployment {deployment-name} --name={load-balancer-service-name} --type=LoadBalancer --port 80 --target-port 8080Here is the actual command I used in this exmaple.
kubectl expose deployment account-service-deployment --name=lb-account-service-gcp --type=LoadBalancer --port 80 --target-port 8080Use the following command to check the progress:
kubectl get serviceIt may take several minutes to bind the external IP address.
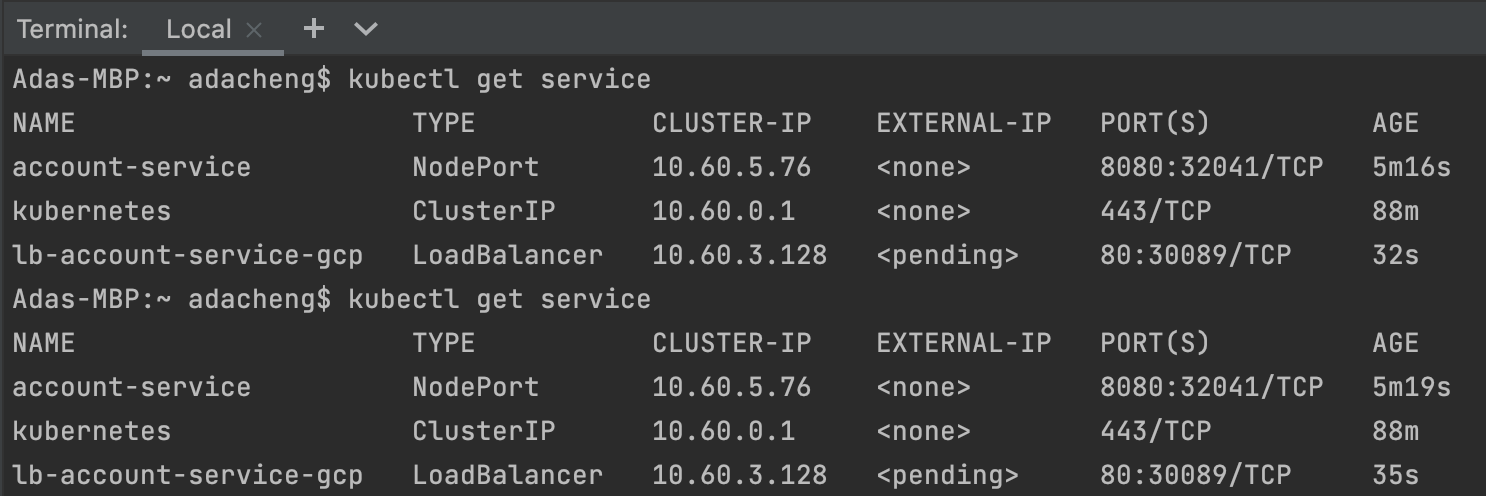
Keep trying until an external IP address is bound.

With the external IP, we can now perform tests.
Test the application functions in GKE
Health Check using external IP:
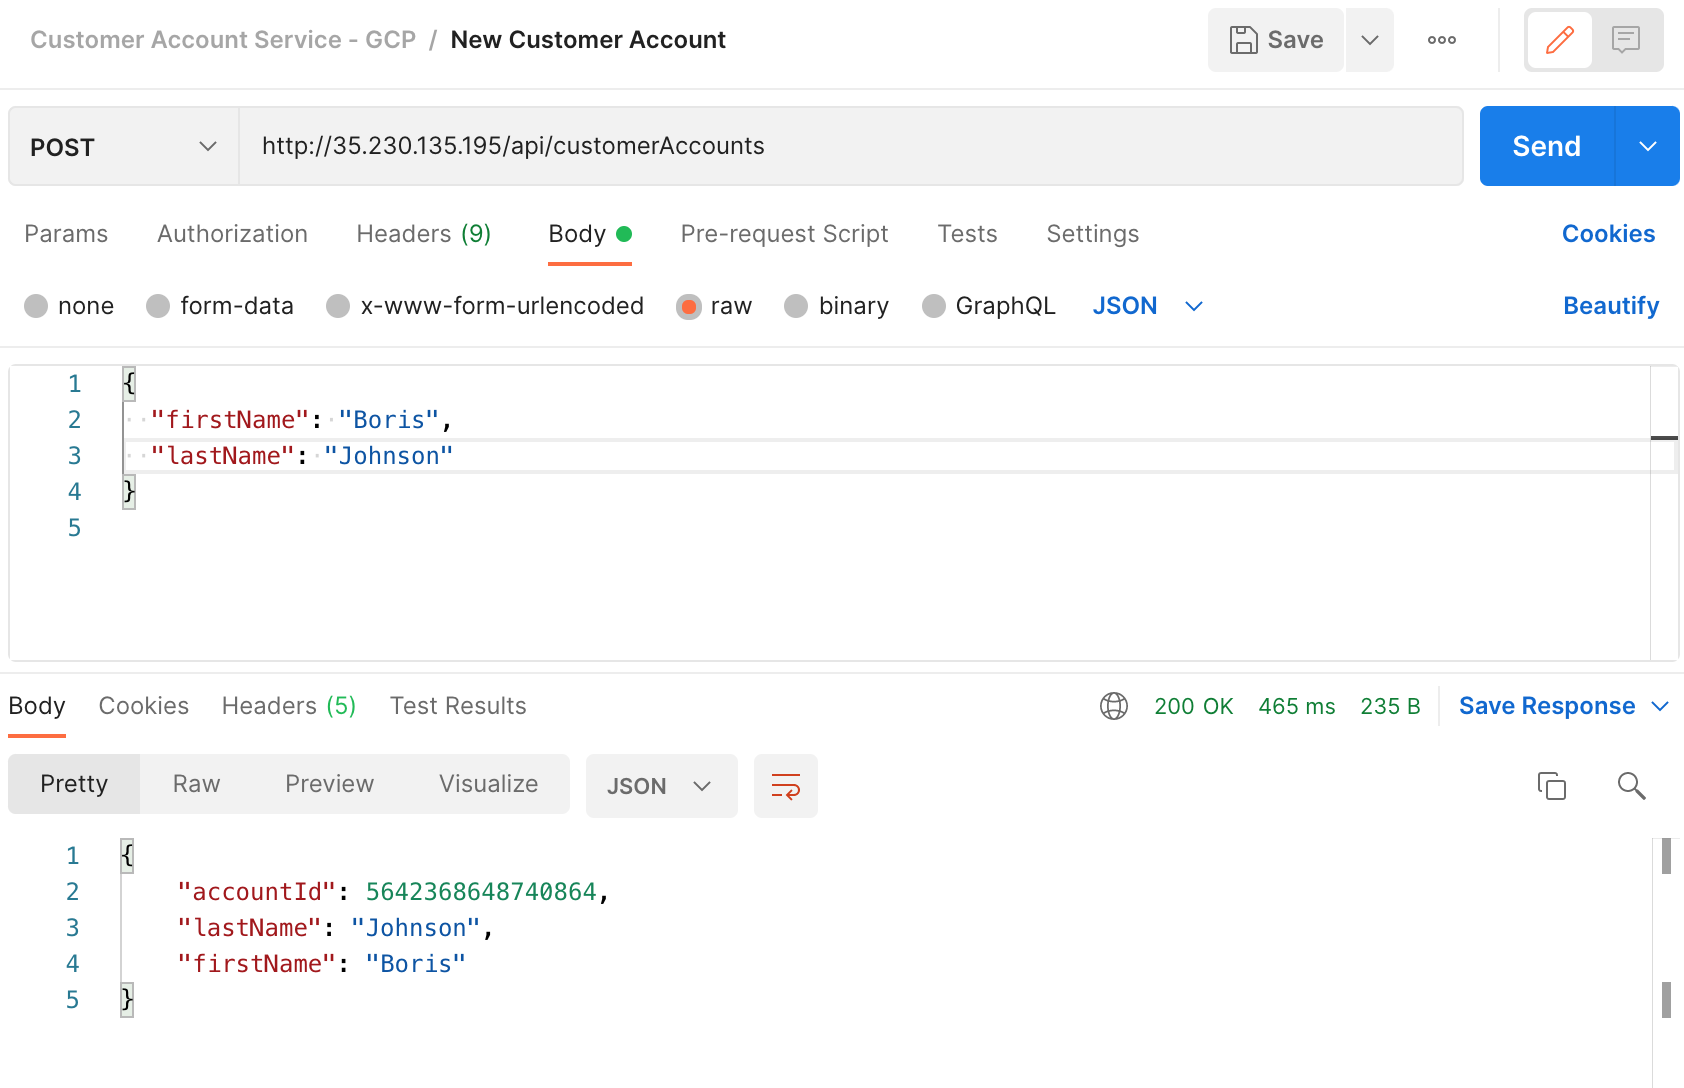
Create new Customer Account using external IP:
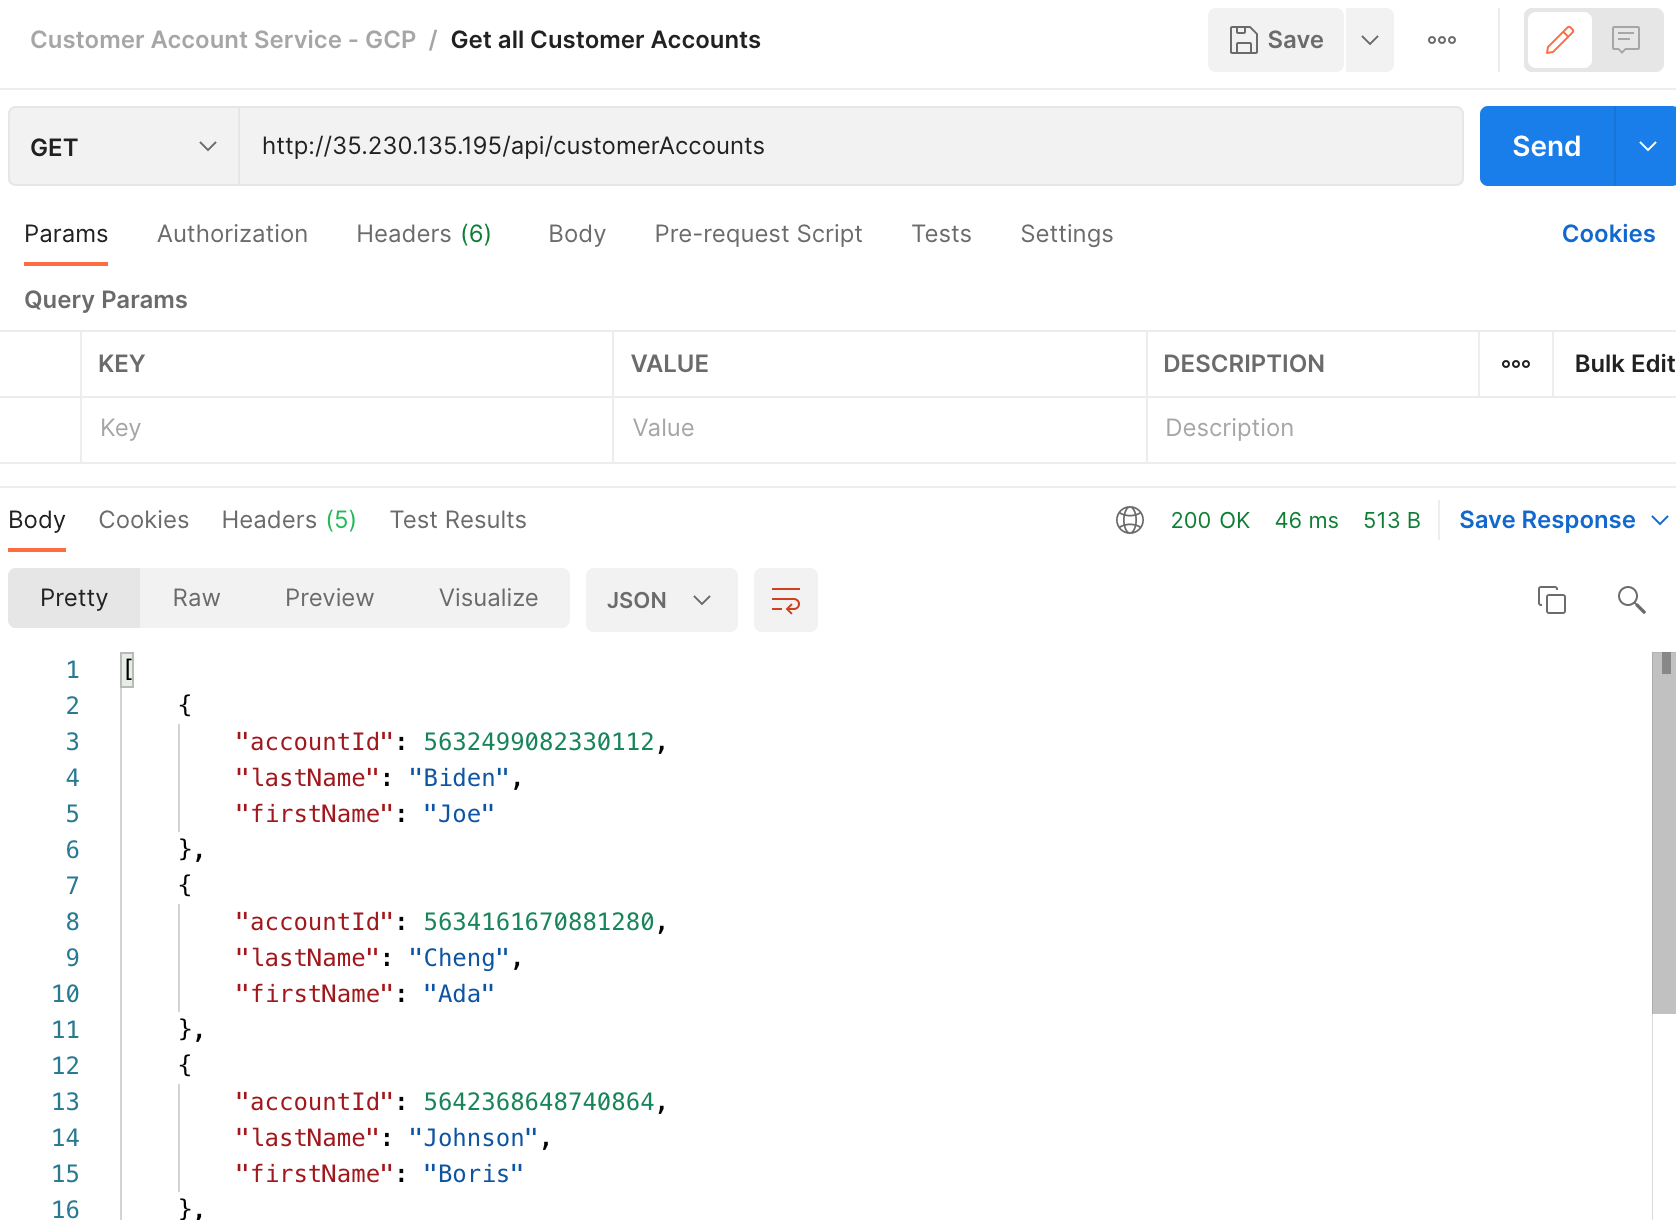
List all Customer Accounts using external IP:
Find Customer Account by Last Name using external IP:
Clean up
Remember to clean up in order to avoid incurring cost.
kubectl delete service account-service
gcloud container clusters delete ms-cluster --region europe-west2-c
Conclusion
Hoorays!
We had created a Java Microservice, which interface with Google Cloud's NoSQL database. We then created a GKE cluster and deployed our microservice to it.